If you’re ready to duel a Worthy Opponent, then you should plan to attend a Fireside Gathering that is hosting an open tournament August 1 through August 3!
Why? Because this could be the first step on your path to the 2014 Hearthstone World Championship! The road to victory begins with these steps:
Step One: Take the top spot at your local Fireside Gathering Open Tournament to earn your way into your region’s online Fireside Pre-Qualifier hosted by ZOTAC.
Step Two: Do well at your Fireside Pre-Qualifier hosted by ZOTAC to earn one of two seeds to compete in the Americas Qualifier Tournament.
Step Three: Make the top four at the Americas Qualifier Tournament to earn a spot at the BlizzCon 2014 Hearthstone World Championship and your shot at the massive $250,000 prize pool!
Are you ready to make your dreams of Hearthstone triumph come true? Refine your decks, read the rules, and prepare for glory!
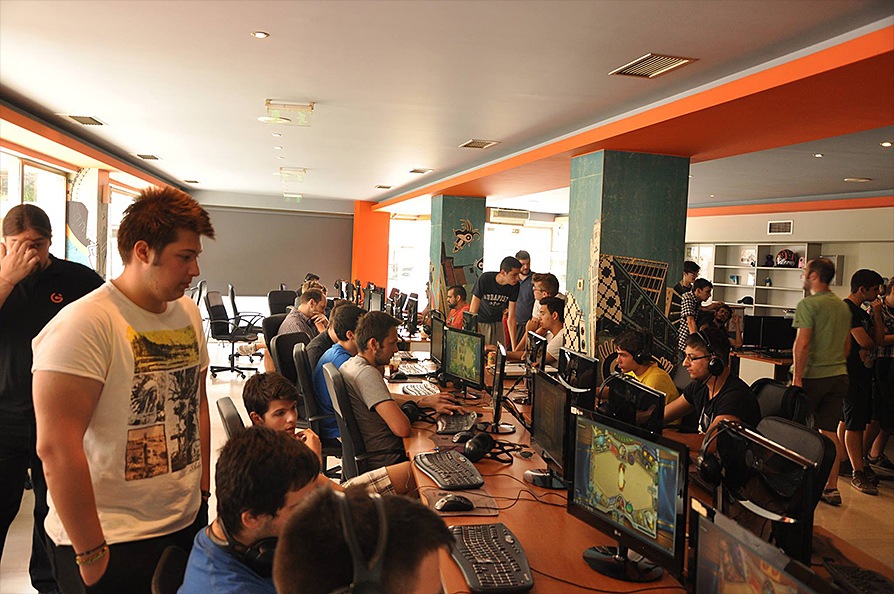
Since the introduction of Fireside Gatherings a couple of months back, inspiring Innkeepers all over the world have done a bang-up job hosting warm little (and not so little!) get-togethers to share the joy of Hearthstone with players in their local communities.
The pics and memories everyone’s posted are incredible, and we’d love to share every event with you if we could—but there are just way too many! Instead, we’ll whisk you around the world on a whirlwind tour of just some of these memorable events. Once we’re through, feel free to visit the Hearthstone Facebook page for even more Fireside event pics.
Kansas City – BlizzPro Fiberside Gathering
BlizzPro hosted its fourth Fireside Gathering in Kansas City at the Google Fiber event space. They held both a ranked and a casual play tournament, and you can catch all the action of the grand finals on this video taken from their tournament stream.
It wasn’t just a tournament though! It was also a charity event, with donations going to support the KU Children’s Hospital in Kansas City.
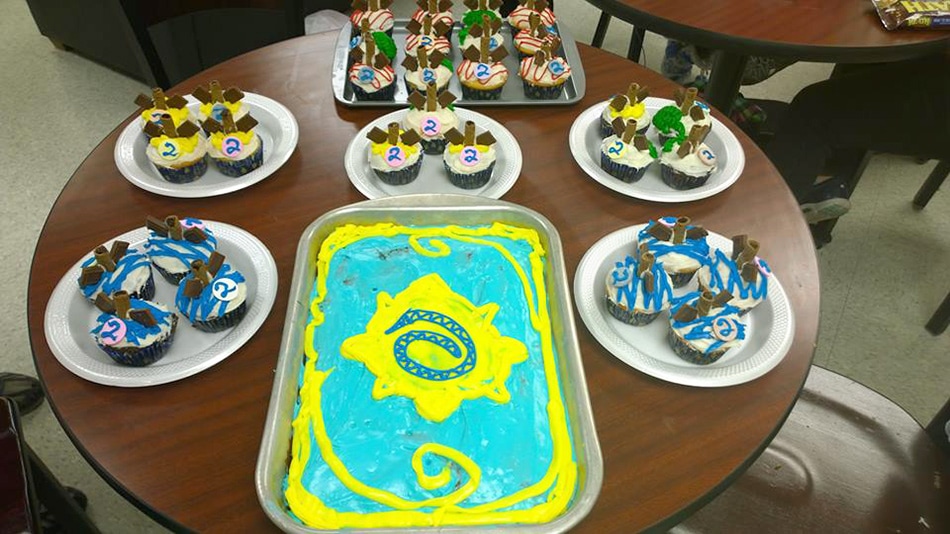
As if friends, fun, and Hearthstone weren’t enough, the UConn Gaming Club worked sweet, sweet magic and conjured up some truly delectable Hearthstone-themed baked goods. We’re jealous! (Send us baked goods, pls.)
They faced some challenges, including fierce weather, but with a lot of ingenuity and a bit of heroism (or was it Bloodlust?), they pulled together a memorable Fireside Gathering. Between the homey notes of the Hearthstone soundtrack, a 1080p crackling fire in the “hearth,” and a plentiful supply of sweets and pizza, the mood was set for an awesome tournament.
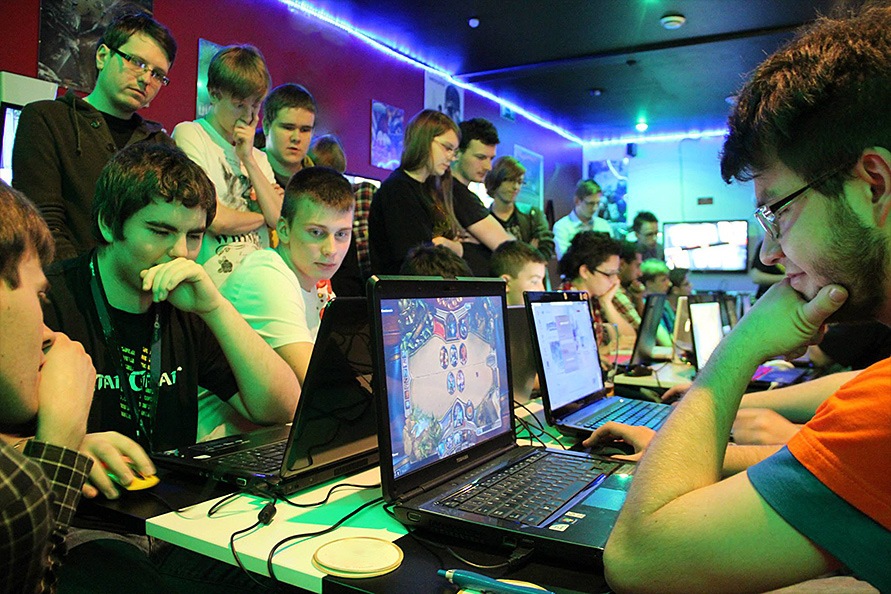
A vast legion of Hearthstone aficionados made an appearance in the Polish city of Łódź to attend Insert Coin’s Fireside Gathering. Over 100 players showed up, and the happy card-slingers enjoyed tournament play, deck building, and a whole lot of Fireside fun.
The organizers even crafted a special real-life Hearthstone card to give out to attendees!
Gnet - Athens Greece
Athens: epicenter of western philosophy, site of the breathtaking Acropolis, ancient birthplace of democracy, and home to a whole lot of enthusiastic Hearthstone players! A crowd of excited deck-builders made an appearance at the Gnet internet café to enjoy friendly games and participate in a tournament.
Barstone Innsbruck Austria
Innsbruck is a picturesque city in Austria brimming with history, and it recently played host to another historic event: the Barstone Innsbruck, the first Fireside Gathering in Austria . . . and they really pulled out all the stops. If you speak German, you can even enjoy a tournament cast they made of the event!
Lots of players, including new recruits and seasoned veterans, showed up to lay down some cards at Barstone, and the result was a whole lot of fun.
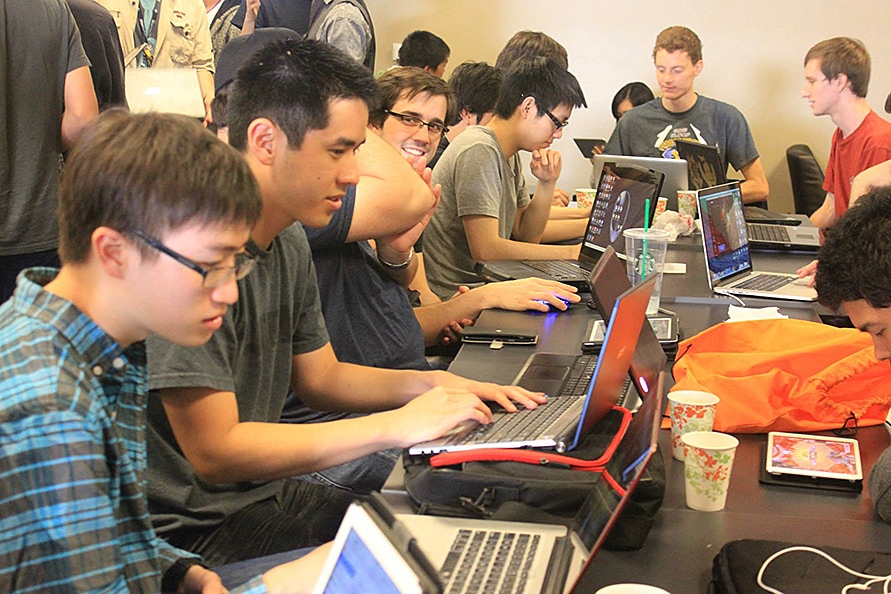
The Association of Gamers – University of California Irvine
We circle back around to Blizzard’s own backyard for our last Fireside Gathering. The Association of Gamers marshaled their Fireside Gathering within the coffee-scented environs of the on-campus Starbucks. It was there that eager Hearthstone players gathered to share stories of past triumphs. After getting acquainted, an RNG tournament was thrown (literally), and the happy players not only enjoyed a raucous tournament, but a special appearance by some folks from Blizzard, including Mike Morhaime and members of the Hearthstone dev team.
Read their (entertainingly written) full recap here.
We hope this little sample has given you a powerful thirst to visit your own local Fireside Gathering! Don’t forget that the first weekend of August will offer attendees an opportunity to earn a spot in a BlizzCon World Championship pre-qualifier!
When last we delved into soloing raids past, we paid a visit to Molten Core. If you’ve never tried tackling an older raid on your own before, be sure to check out that guide, as the first half serves as a primer on soloing raid content.
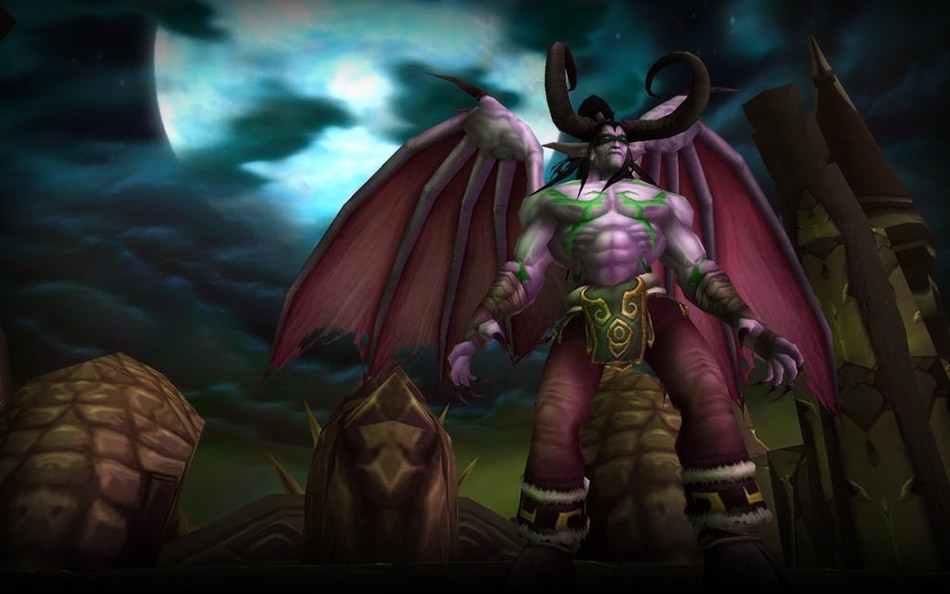
Rather than be predictable and move straight on to Blackwing Lair, we thought it would be more fun to briefly alight on raids from different eras, slay the inhabitants, and move on -- like an especially bloodthirsty butterfly. So let us flutter to Black Temple, storied raid from the Burning Crusade era and stronghold of one of the most recognizable and iconic characters in all of Warcraft lore: Illidan Stormrage. By the time you’ve finished reading this walk through, you will be prepar-
Wait! Stop. You know what? No. We’re not making that joke.
We’re not going to do it.
You’ll be… ready to face Señor Stormrage and his cronies. With that, let us begin!
The Desecrated Temple
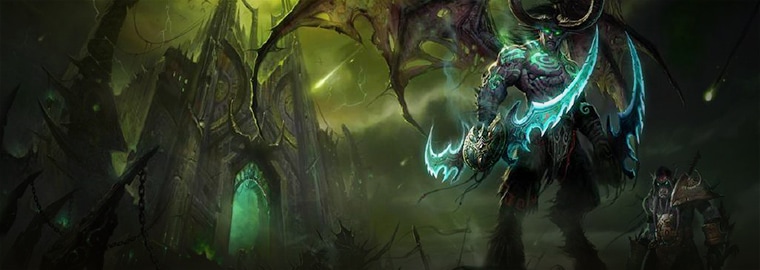
Long ago on Draenor, the Temple of Karabor was the center of draenei worship. But the devout priests who prayed there are long dead, slaughtered by marauding, demonically corrupted orcs. In the aftermath of the massacre the warlocks of the Shadow Council seized the structure and bestowed upon it a new name: the Black Temple.
When Illidan the Betrayer fled to Draenor (now called Outland), he ousted the Temple's ruler - the pit lord Magtheridon - and claimed his throne as the lord of the blasted world. Despite the bitter retribution of his enemies, Illidan has begun to tighten his grip on Outland from within the profaned sanctum, where he awaits one who would challenge his rule.
Black Temple was introduced in Patch 2.1 of The Burning Crusade expansion, so that means that we’re taking a trip to Outland! After watching Illidan discuss matters of preparation in the expansion trailer, the heroes of Azeroth would finally get to go toe to toe with the man (Night elf? Demon? Demon.) himself.
Let’s Talk Loot
There’s some very cool stuff to swipe from the Black Temple, too much to cover here in detail. Here’s a sample instead:
Tier 1 Armor Sets
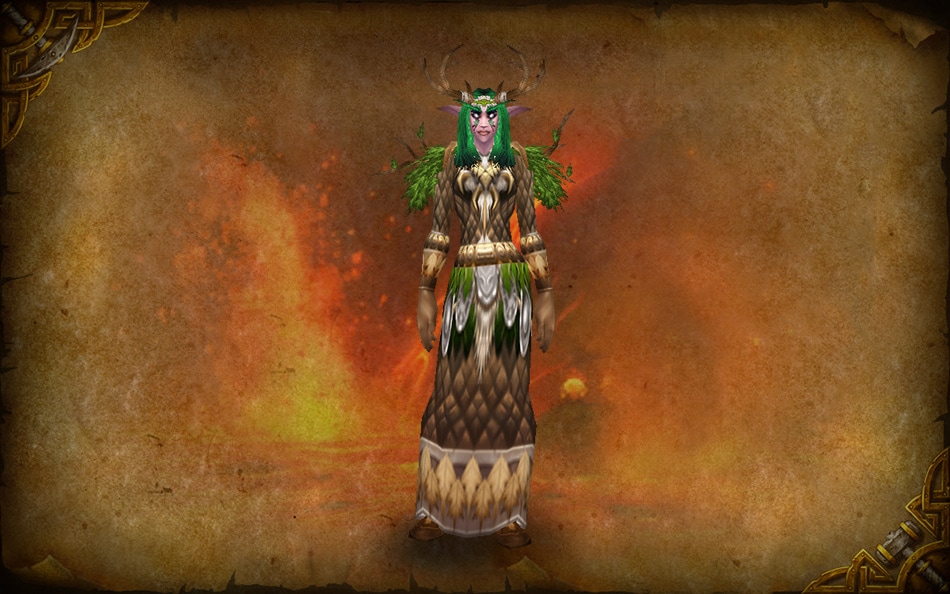
Druid - Thunderheart Regalia
Hunter - Gronnstalker's Armor
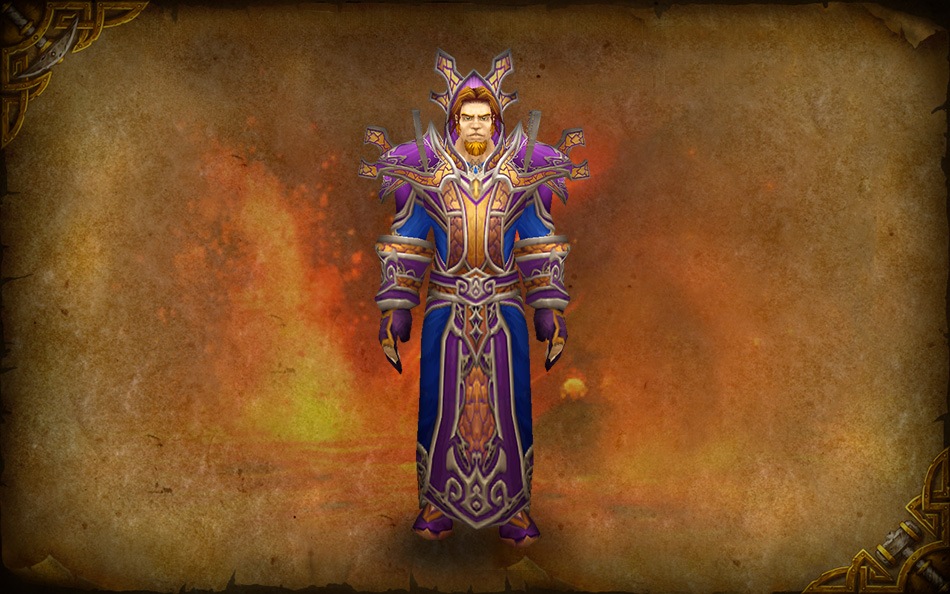
Mage - Tempest Regalia
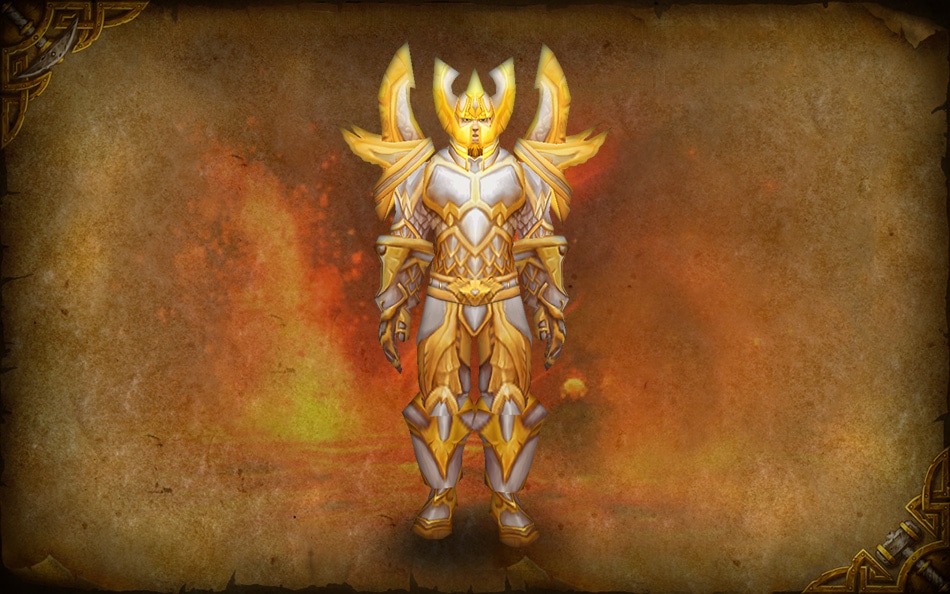
Paladin - Lightbringer Armor
Priest - Absolution Regalia
Rogue - Slayer's Armor
Shaman - Skyshatter Raiment
Warlock - Malefic Raiment
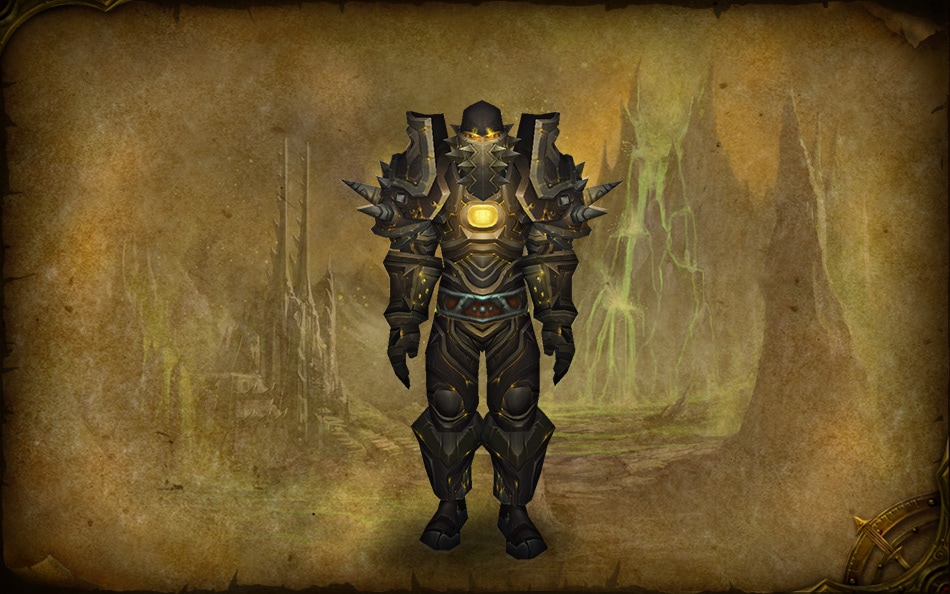
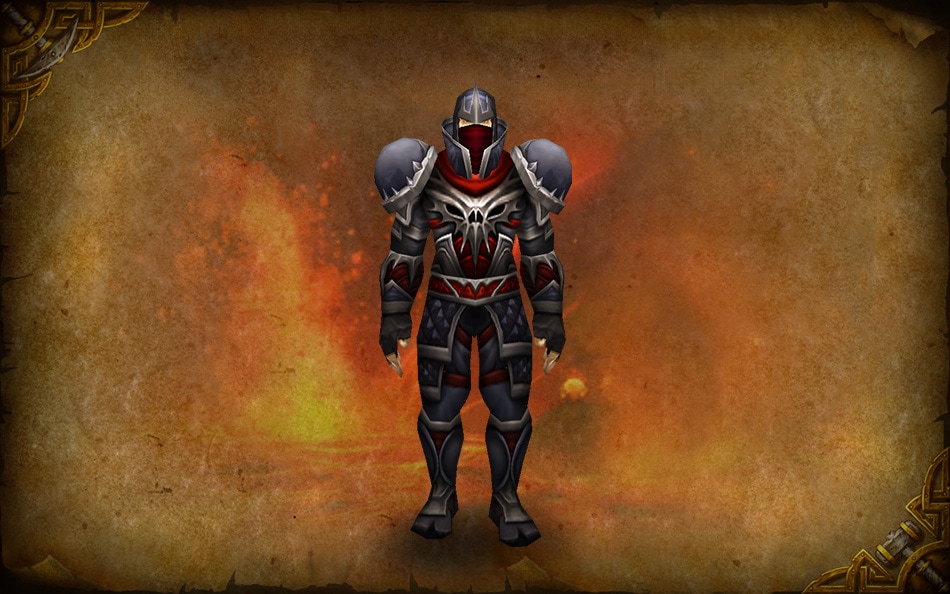
Warrior - Onslaught
Tip: Only the Tier 6 Shoulders, Pants, and Chest items are actually found inside the Black Temple. Gloves and Helms can be looted from Hyjal Summit, while Bracers, Belts, and Boots, are obtained from the Sunwell Plateau. Note that there are items that match your set in the Black Temple (including re-colors *cough* Monks and Deathknights, I’m lookin’ at you), they just aren't officially part of the set.
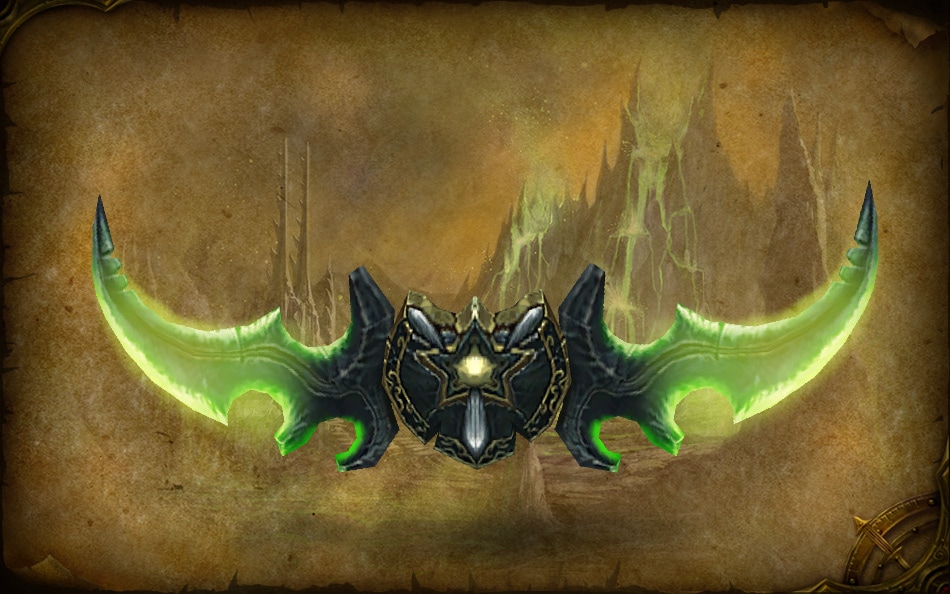
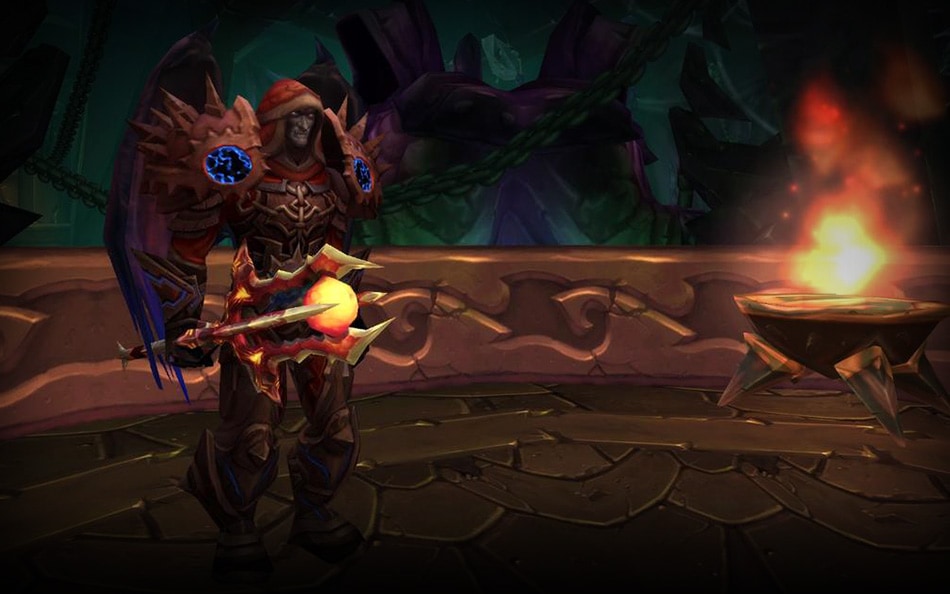
Dem Warglaives. Unlike many of the other Legendary weapons that can be acquired from World of Warcraft’s various bad guys, one or both of the Warglaives of Azzinoth simply have a chance to drop when you defeat Illidan.
Faction
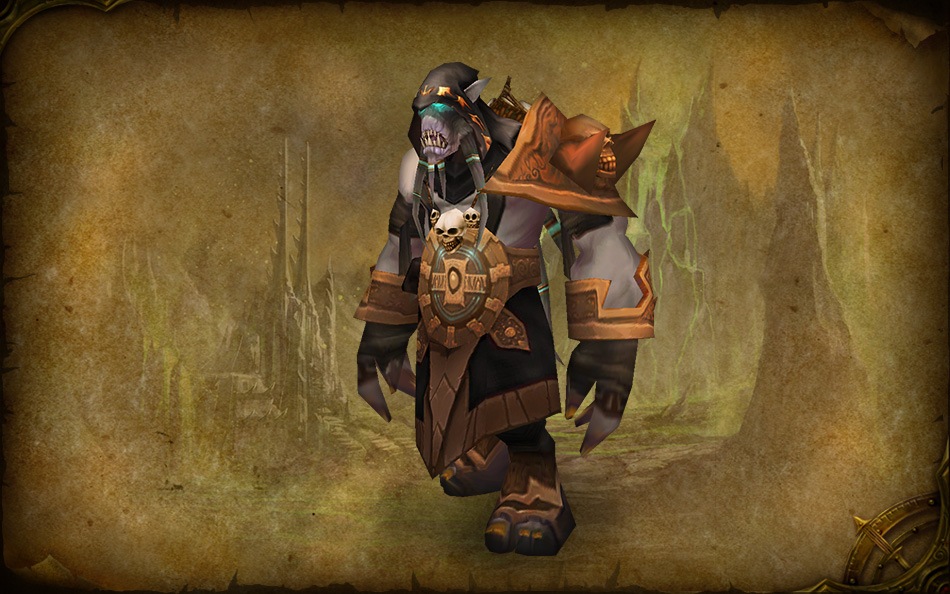
The Ashtongue are a tribe of Broken, led by Elder Sage Akama, that offered allegiance to Illidan Stormrage to take vengeance upon those who had subjugated and slaughtered their race. The Deathsworn are an elite faction (also led by Akama) within the Ashtongue that have sworn undying loyalty to Illidan himself. Unfortunately, Illidan proved to be little better than those the Ashtongue had sought vengeance against. The Deathsworn are plotting to betray the Betrayer, they want Illidan’s head, and they want your help to take him down and free their people. Akama, and his Ashtongue, will be valuable allies as you infiltrate the Black Temple.
Slaying foes within the Black Temple will improve your reputation with them, and there are quest lines in Outland that will net you rep with them as well.
An Outing to Outland
If you’ve never been to Outland, there are a few different methods to get there. The fastest way is via your faction shrine in the Vale of Eternal Blossoms. Visit the portal chamber and take the portal to Shattrath. From there it’s an easy flight east to Shadowmoon Valley. Alternatively, if you want to go the old-school route, you can visit the Blasted Lands zone in the Eastern Kingdoms to walk through the Dark Portal into Hellfire Peninsula. Then you can fly due south over the yawning, terrifying void straight to Shadowmoon Valley, or you can take the long way around through Terokkar Forest.
Once you’ve reached Shadowmoon Valley, the Black Temple is found in the eastern reaches of the zone. The exterior of the Temple has a lot going on, but to reach the raid, we’ll want to head straight up the main thoroughfare. The entrance isn’t through the main gates, which are sealed, but rather through a breach in the wall to the south (on the right, if you’re facing the Temple gates), through which the instance portal is visible. You'll see a lot of guys running around down there, but fortunately for us, they couldn’t manage to assemble a work crew to get that hole patched. Maybe they were distracted by Doomwalker. Regardless, it’s easy to get into the Temple. Attunement is no longer necessary, though the quests still exist if you want to experience them and get a little background on what Akama. is talking about while you’re inside.
Zoning Out(land)
As you head into the Karabor Sewers you’ll pass the Spirit of Olum. He can help you teleport back into the Temple should you decide to call it quits for the day or perish before clearing the instance.
The Sewers aren't the cleanest of environs, but you can readily skirt most of the critters in here except those standing directly in front of doorways, and at level-90 they don’t present much of a threat. Move past Olum, head up the sewer tunnel to the right, and then hang a left. You’ll soon see High Warlord Naj’entus in an alcove to the right.
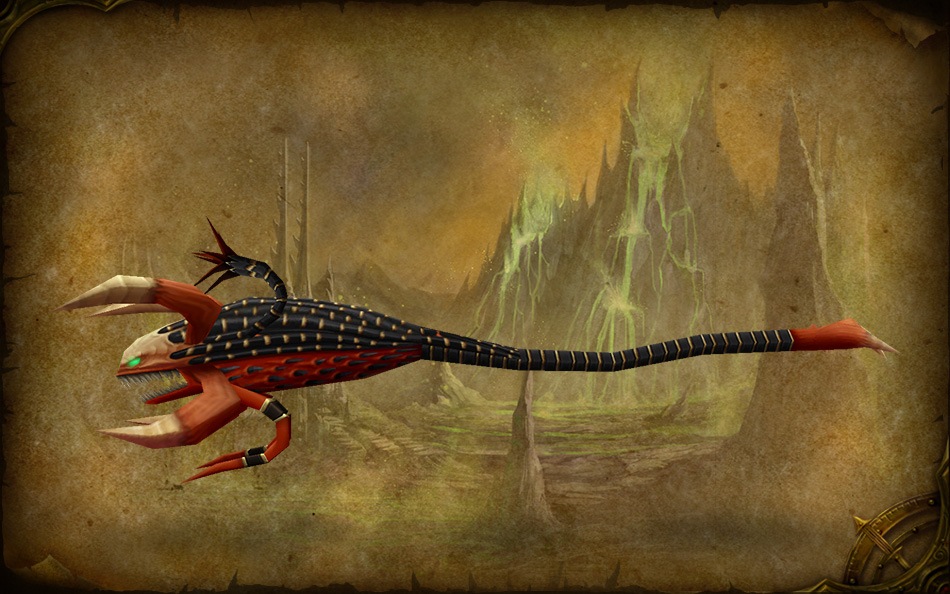
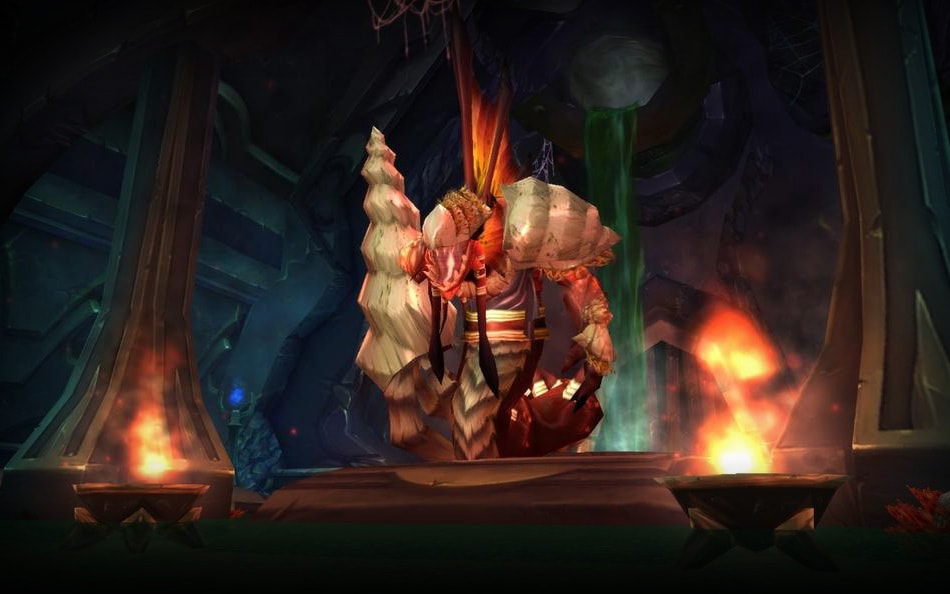
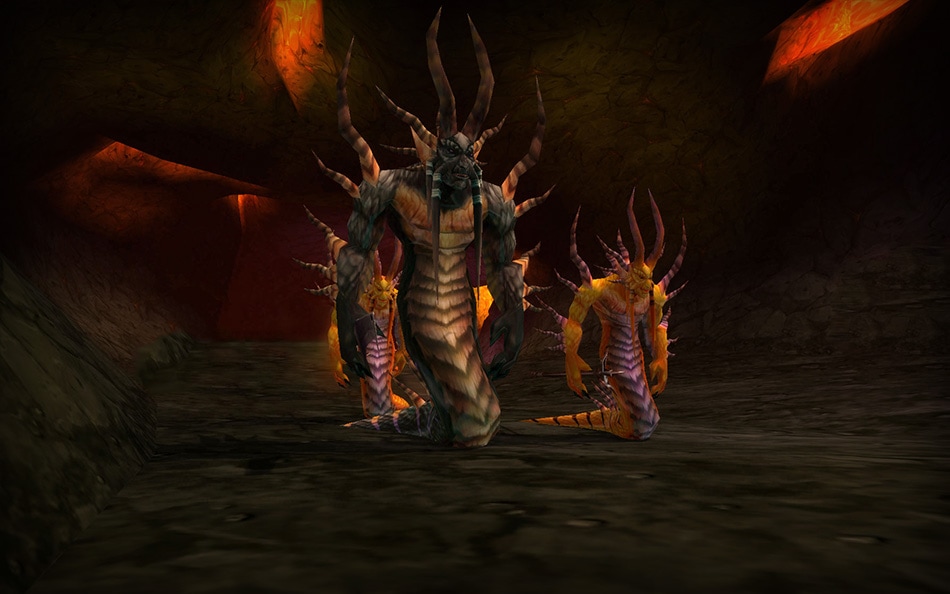
High Warlord Naj’entus - is one of Lady Vashj’s lieutenants, a massive naga with bizarre shell-like growths erupting from his body. Two Aqueous Lords are hanging out nearby. You can pull the Lords separately and kill them before you engage Naj’entus. Otherwise, they’ll attack when you engage the High Warlord anyway. Fighting this boss is pretty straightforward, and shouldn’t present much of a challenge. If you're familiar with the original encounter, you'll be happy to hear that he no longer throws his dreaded Spine at solo heroes that oppose him. The downside is that, after a minute passes, he will surround himself with a Tidal Shield that could once be broken by those Spines. Now you’ll have to wait it out while he heals, but you should be able to take him down in time.
Once Naj'entus is down, turn around and head through the doorway guarded by a Hydra, move past a swarm of Aqueous Spawn into the broken sewer pipe, and then follow it upwards to emerge into the Illidari Training Grounds.
Tip: Look up! A planet (could it be Azeroth?) is visible in the sky from the Illidari Training Grounds. Pretty!
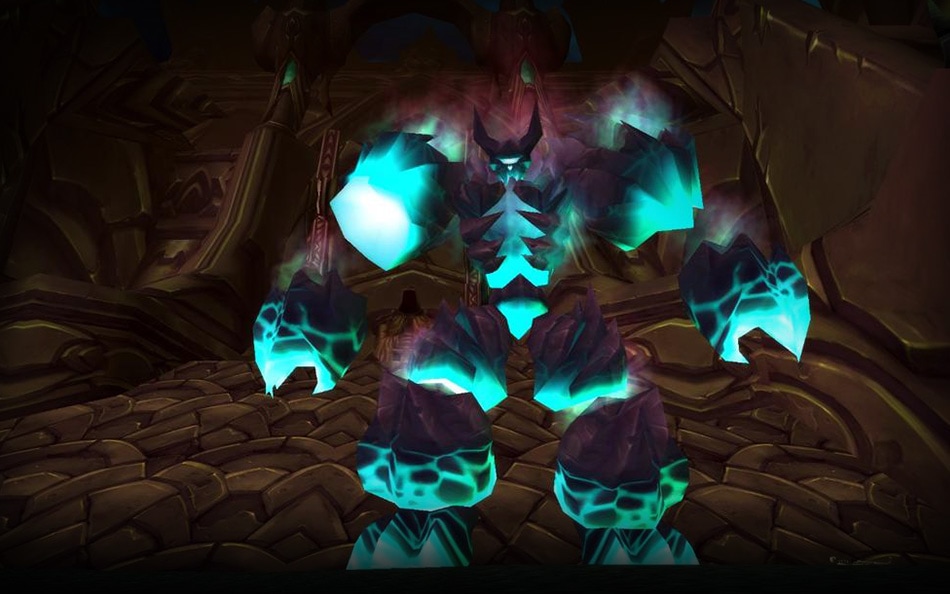
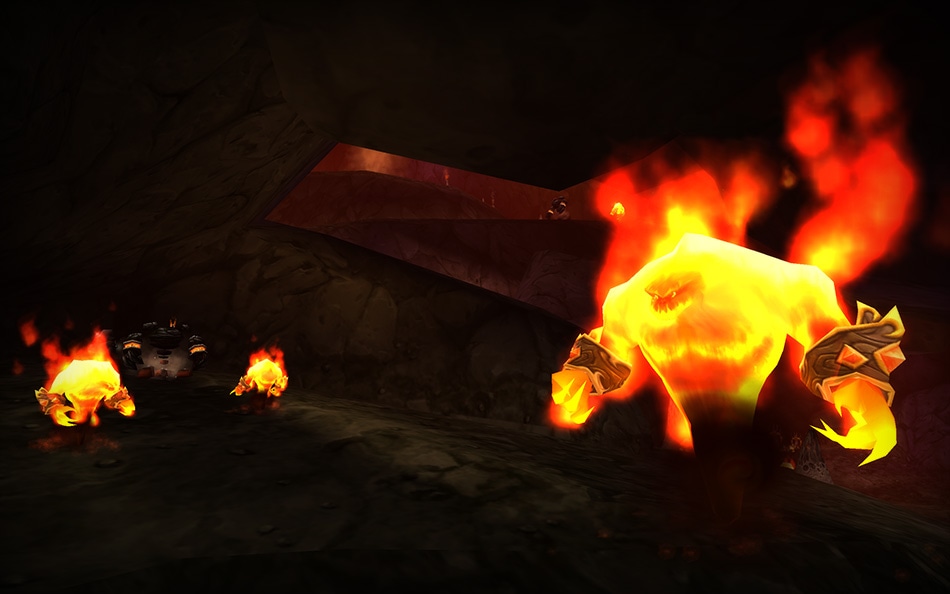
Supremus - is an enormous, blue-tinged Abyssal overseeing the Bonechewer and Dragonmaw orcs assembled in the Illidari Training Grounds. You’ll find him standing near the sealed gates to the Black Temple over on the right--you can’t miss him. You’ll have to douse him to gain entry.
The most dangerous thing about Supremus (though still not particularly dangerous to level-90 characters) is the blue fire he’ll spawn at your feet. That’s easily dealt with by shifting position to the left or right to avoid standing in the fire, but be sure to position yourself in such a way that his knockback won’t hurl you into the troopers who are inconveniently loitering in the area.
Killing Supremus causes the gates of the temple to spring open. Head up the stairs and past the gate to enter the Sanctuary of Shadow. You can technically take on any of the four bosses down here in any order, but we’ll present the bosses in the same order they were typically slain back when the raid was current content. With that in mind, head to the right to enter the Refectory.
Unless you’ve got access to stealth, you’ll be forced to fight some packs guarding doorways, and even at 90 some of Illidan’s servants, particularly the Ashtongue Feral Spirits (which see through stealth) have a surprisingly wide aggro radius. When you engage foes in this area, be sure to kill the Ashtongue Battlelords first, as their Concussive Throws have the potential to lock you down with long-lasting stuns. The Primalists can also cast a Sweeping Wing Clip that will root you temporarily, though that’s less troublesome. If your class or race doesn’t have a means of breaking crowd control, it might be advisable to equip a PvP trinket so you can break out of the Concussive Throw stun, just for the sake of convenience.
Shade of Akama - When you enter the Refectory, Akama will be there waiting for you.
Let him wait a little longer: you’ll make things a bit easier on yourself if you clear out the trash in the room first (remember: kill those Battlelords first!). After you finish clearing the Ashtongue loitering about the Refectory, let Akama know you’re ready to roll. He’ll begin channeling a beam at the Shade of Akama, and the Channelers who surround the shade can now be slain. Kill off the Channelers and then help Akama defeat the Shade of Akama to free his soul, sparking open revolt among the Ashtongue against Illidan. After you slay the Shade, Akama will address his people and the remaining hostile Ashtongue Broken within the Refectory will despawn. Their tribemates throughout the Temple will no longer be hostile – though they won’t help you fight either.
Elder Sage Akama – One of four major lore characters found in the Black Temple that hearken back to days of Warcraft yore, Akama has been with us since Warcraft III: The Frozen Throne, where he fought alongside Illidan, Kael’thas, and Lady Vashj. Check out the Curse of the Blood Elves campaign if you’d like to see how it all played out.
Teron Gorefiend - Exit the Refectory and turn right to head upstairs to Gorefiend’s Vigil. You can skirt most of the Shadowmoon Orcs in this area, aside from those patrolling the stairwells or guarding the doorways, but nothing is very dangerous either, so slay to your heart’s content.
This part of the Temple is pretty linear, so there’s not a lot of room for confusion. After you reach the top, Teron Gorefiend will briefly reference his status as the first Death Knight and his many turns through the wheel of death. Clear the two Hand of Gorefiend honor guards that are standing near him, otherwise they’ll join in when you engage Teron, then set about sendingMr. Gorefiend back around the wheel one more time. (Fun fact: You are responsible for resurrecting Teron over the course of a quest line in Shadowmoon Valley)
After you lay Teron to rest again, backtrack to the Sanctuary of Shadows and head up the stairs onto the center platform. In the alcove to the east, completionist crafters can talk to Okuno to repair your gear or purchase tailoring, leatherworking, and blacksmithing patterns at rep levels from Friendly to Honored. Aluyen sells reagents to those who forgot to stock up.
The Spirit of Udalo can teleport you to the Chamber of Command after you’ve cleared out the other bosses.
Reliquary of Souls - Head up to the right to enter the Halls of Anguish. Upon entering, hang an immediate right to head through the soul fragment haunted halls that lead to the Reliquary of Souls. Initially ensconced within a pulsing, rib-cage-esque wrapper, the boss will emerge to show three faces to you, each of which has special effects. After you defeat each face, you’ll need to clear out a swarm of Enslaved Souls, each of which will heal you upon death. In fact, you don’t even need to destroy them. They’ll swarm around your hero, and eventually detonate with healing. Here’s what to expect from each phase:
Essence of Suffering – The important thing to remember during this phase of the fight is that the Essence of Suffering applies an aura that reduces all healing by 100%. You probably won’t need it, but still.
Essence of Desire – This is easily the most dangerous phase of the fight, and a real threat to the inattentive. The Essence of Desire applies an aura that causes 50% of your damage dealt to strike you as Shadow damage, though it also increases the healing you receive too. She will also apply Spirit Shock which is a confusion effect, and Deaden, which increases the damage you take by 100%. Use of defensive cooldowns and healing helps, but it pays to keep an eye on your health to make sure you aren’t accidentally sticking it to yourself, particularly during the brief durations that Deaden is active.
Essence of Anger – Should be an easy fight. The Essence of Anger’s aura deals Shadow damage over time, but also increases your damage dealt over time. You got this.
Now that the Reliquary has been shut down, head back down to the opposite end of the hallway. Clear the pack of orcs guarding the stairwell, then enter that doorway and continue downstairs where Bonechewer pugilists are pugiling. You can likely skirt them by keeping to the left and sticking to the walls.
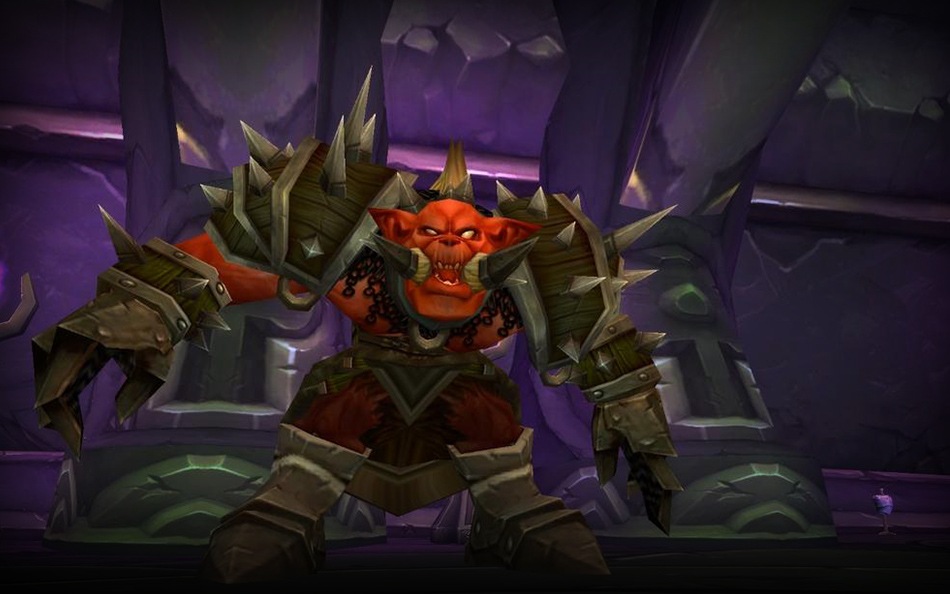
Gurtogg Bloodboil- There at the bottom of the ramp you’ll find Gurtogg Bloodboil. He’s a big red orc, and a pretty rough customer. Between the damage over time from his Bloodboil ability, Acidic Wounds (that also reduce armor), and rapid fire melee strikes, Gurtogg can pump out a surprising amount of damage that ramps up over the course of the fight as those debuffs stack. On top of that, his Bewildering Strike can leave you confused and vulnerable for 8 seconds. He's a real danger even to level-90 characters. High damage output, self healing and defensive cooldowns are key. Abilities that can clear his debuff stacks are especially helpful, but note that only certain effects can clear his Acidic Wound stacks, such as Divine Shield, Ice Block, and Cloak of Shadows. You may need to experiment with different talents and abilities, or even gear up a bit, but you’ll lay him low eventually.
After you kill him, head up the stairs to the east and take two quick lefts to leave the Halls of Anguish and return to the Sanctuary of Shadows once more.
Now that the Shade of Akama, Teron Gorefiend, the Reliquary of Souls, and Gurtogg are all dead, it’s time to move on to an altogether more pleasant place: the Den of Mortal Delights, where Mother Shahraz dwells. Still, don’t let the gauzy curtains and comfy cushions fool you: everything here wants to kill you. Don’t get too close to the concubines, because despite ‘Charming’ being in the name, they’re anything but. Hang a left and move up the stairs deeper into the Den. Much like Gorefiend’s Vigil, this route is pretty linear, so it’ll be tough to get lost.
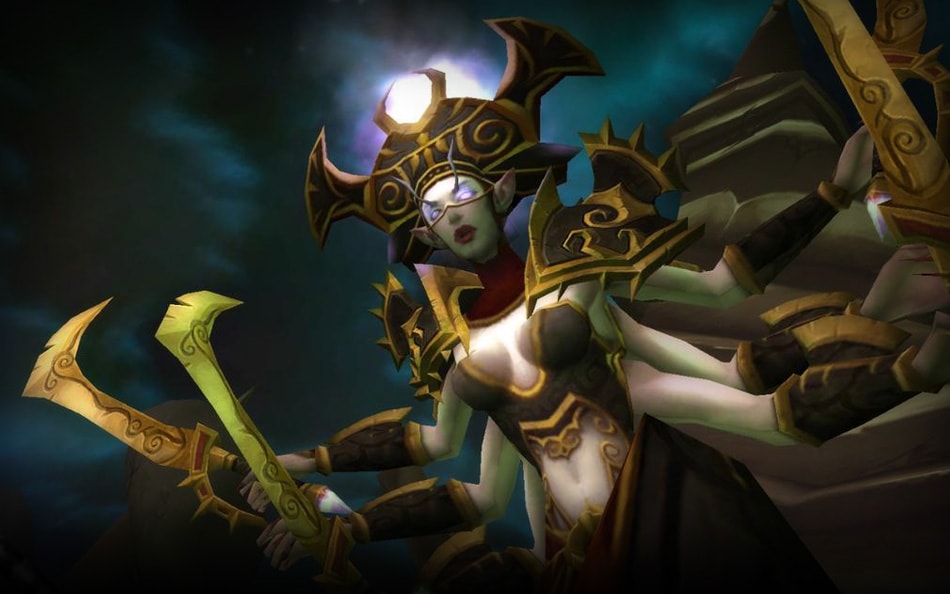
Mother Shahraz- A demoness of the Shivarra race who presides over the Den of Mortal Delights. She’s actually pretty tough and deals a decent amount of damage, particularly with Saber Lash, though she’s still probably not too dangerous to level-90 characters. Her Silencing Shriek is potentially inconvenient for casters, but it’s resistible and likely won’t land. She’s also the first boss in the Black Temple to have a chance to drop Tier 6 armor pieces, specifically Shoulder items.
After you defeat her, turn right, and head up the Grand Promenade, dodging Promenade Sentinels as you go, until you reach the top of the staircase. Aside from one Sentinel at the top of the staircase, you should be able to dodge most of the trash here if you don’t feel like fighting it. Without stealth, you will definitely need to clear one pack of blood elves standing near the entrance to the Chamber of Command on the right.
Tip: Turn in your Tier 6 tokens to Tydormu, found within the instance entrance to Hyjal Summit at the Caverns of Time. The fastest way to get there is, once again, via your faction shrine in the Vale of Eternal Blossoms. Take the portal to Dalaran, then head to the Violet Citadel where you can take a portal to the Caverns of Time.
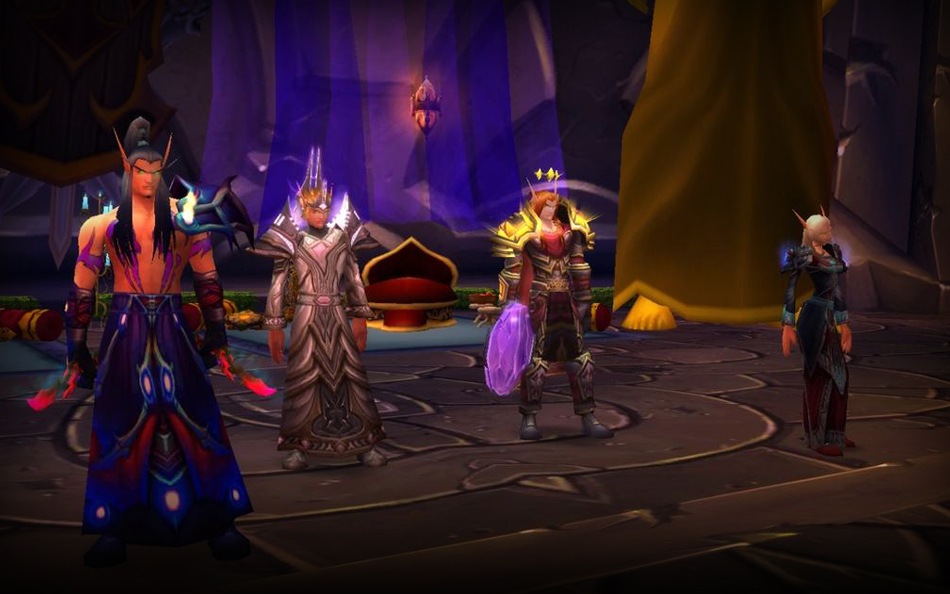
Illidari Council- Enter the Chamber of Command to face off against Illidan’s inner circle: the Illidari Council. The Council is composed of four blood elves who share a health pool:
Veras Darkshadow – As a Rogue, he’ll Vanish frequently, and makes a poor main target.
High Nethermancer Zerevor – He’s a Mage, and may not be your best option for a main target either.
Gathios the Shatterer – Gathios is a Paladin. He’s got a slew of abilities and will sometimes cast Blessing of Protection on other members of the Council. He’s not a bad choice for your main target, since he’ll largely stay on you throughout the fight.
Lady Malande – She’s a Priest, and every 20 seconds or so, she’ll try to cast Circle of Healing. It’s very important to interrupt this spell if you can, so consider making her your main target if you have trouble switching targets in the middle of a fight.
This can be a very tough fight, even for a level-90 character. Strong damage output, self-healing, and interrupts help a great deal. A significant portion of the Council’s damage arrives via ground based area of effect (AoE) abilities, so it’s important to shift position periodically as new AoEs are cast to minimize your incoming damage. As with Gurtogg, you might have to experiment with abilities, talents, and tactics to figure out what works. You’ll have a much easier time dealing with them if you stay out of those AoE’s and interrupt Malande’s Circle of Healing every time she tries to cast it.
After you finish off the Council, Akama will appear at the base of the dais. Maybe he was there the whole time and didn’t help. Regardless, talk to him and then follow him up the ramp on the left side of the Chamber. Once at the top, he’ll unlock the door to Illidan’s sanctum with the help of the spirits of Olum and Udalo. Follow him to the Temple Summit, and speak to him again to begin the confrontation with Illidan.
Tip: The Illidari Council drops Tier 6 leg tokens.
Illidan Stormrage, the Betrayer - The first Demon Hunter, and twin brother to Malfurion Stormrage. Illidan was an instrumental figure in the War of the Ancients. He was imprisoned by his own brother for 10,000 years under the guard of the Watchers, including Maiev Shadowsong and her fellow priestesses, when Tyrande freed him to help face down the Burning Legion. He once went one on one with Arthas. His actions have left an indelible Illidan-shaped mark on the history of Azeroth and Outland alike, spanning Warcraft III and World of Warcraft. His story can (and has) filled volumes. He is the most interesting man (Night elf? Demon? Demon.) in the Black Temple. And now you get to kill him.
You’ll find Illidan kneeling in the center of the Temple Summit, so absorbed in the Skull of Gul’dan that he doesn't respond to your presence. When you’re ready to take him on, talk to Akama to start a conversation between him and Illidan, where they discuss Akama’s inevitable betrayal. Illidan will become vulnerable to attack shortly after their conversation concludes.
Surprisingly, Illidan will likely prove easier to handle than some of the fights you’ve already dealt with. In phase one of the fight, you and Akama will face him together. Illidan does a decent amount of damage, but he probably won’t represent a tremendous threat. Periodically he’ll leap dramatically into the air, and fire a blast down at you that leaves a burning blue blaze on the ground--as always, don’t stand in the fire. As phase one ends, Akama will depart (thanks Akama), and Illidan will once again leap into the air. This time he stays there, and hurls his Warglaives to the ground on either side of a grate.
This is where the fight gets tricky. Each Warglaive has a Flame of Azzinoth trapped within it, and they’ll emerge from the weapons to attack you. If they are moved too far away from the Warglaives they will enrage, and deal more than enough damage to make short work of even a level-90 hero. To keep that from happening, stand in the center of the grate, and take out both Flames of Azzinoth while standing within the vicinity. After both Flames are put out, Illidan will descend once again.
You’ll re-engage him, and after you do more damage, he’ll take some time to lock you in an unbreakable Shadow Prison and talk some trash. Drop some more damage on Illidan, and Maiev Shadowsong will arrive when he reaches 30% health, contributing to the fight by dropping traps you can use to increase the damage that Illidan takes. If you take it easy on your dps output, you may witness Illidan assume his demonic transformation!
After the Betrayer is laid low, he relates to Maiev that she should feel bad. And she does. Which motivates her to do some pretty crazy things later on.
Tip: If you fall in battle against Illidan, talk to Olum to be teleported back to the Chamber of Command.
Wrapping Up
Thus ends your battle with Illidan Stormrage. That wraps up our walk-through of Black Temple, but there is more yet to come, and we’ll be taking you on a guided tour of more classic raids in the future.
In the meantime, share your stories of Black Temple glory (and loot!) in the comments!
On a serious note, I will really miss you. Not that anyone remembers, but back in early December i had one of the worst weeks ever and your well wishes genuinely brightened my day. It's easy to underestimate the impact of small gestures in forging your relationship with a community, but you've never been afraid to be a human as well as a CM and I've always appreciated that about you.
Aaaand now I have a million feels. Thanks Hipp. That means a lot to me. ♥
WoW players have access to an endless arsenal of community-made resources, including guides, utilities, and news sites—often mixing all of the above. We want to guide you to the tools that will help you enjoy World of Warcraft to the fullest, and to accomplish that lofty goal, periodically we’ll point you toward a site that offers the kind of content we think you’ll find valuable.
Wowhead is a database that has become an indispensable general resource for World of Warcraft players seeking information on a wide range of topics, from items, to talents and abilities, instances, quests, zones, the latest news, and more.
The Search is On
When you stop by Wowhead, you’ll be welcomed by the site title (with trademark rocket) and a search bar, much as though you were visiting a search engine. In fact, you can use Wowhead in much the same way. Want to learn more about that quest you’re having trouble with, or look up a specific item or NPC? Just type it in, and you’re on your way.
There’s an almost mind-boggling amount of information on the site, but you’ll find it all neatly organized. In addition to the search bar, there are several tabs listed below that you can click to view drop down menus that will lead to individual sections and utilities:
Database – This drop down leads to the extensive database that Wowhead encompasses. This is where you’ll find Wowhead’s new Class guides. The Instances database helps you discover the bosses and layouts of each dungeon and raid. If you’re hunting for your next upgrade, then the Item database is a tool with robust search features. If you need more information on a quest, you’ll find it here. There are also maps of each World of Warcraft zone available. There are even custom-made databases to help you find that perfect Transmogrification set and round out your Battle Pet roster. Whichever database you visit, they’re all linked, and the ‘Related’ tabs can prove particularly helpful, allowing you to find out about related quests, NPCs, professions and more. The Comments beneath a particular entry often contain valuable information, and they’re marked by date and patch, to help you make sure the information in a given comment is up to date.
Tip: If you want to learn more about the upcoming expansion, you can find all the latest information at the Warlords of Draenor database.
Tools – The Tools section gives you great options for customizing and tracking World of Warcraft characters, including the Profiler to track your completed quests (great for helping you complete that Loremaster achievement!), what mounts and profession recipes you've learned, and more. There are Talent Calculators (for both Mists of Pandaria as well as Warlords of Draenor), Pet Battle utilities, tools to help you find and compare items, as well as a client that enables you to help keep Wowhead's database up to date as you play.
The Wowhead Model Viewer is a fun utility that allows you to preview in-game models, as well as dress your character up to see exactly what that gear will look like before you head out to farm it up.
Tip: If you run a site of your own, there are also tools here that will let you enable mouse over tooltips on items, add a Wowhead search bar, and add a news feed to your site.
Guides – This section includes guides of every sort written by knowledgeable players as well as Wowhead staff. The guides are grouped according to category, then listed out by title, author, rating, views, comments, and which patch they pertain to. There are a stunning variety of guides available, written on subjects such as obtaining achievements, class guides, playing the auction house, and much more. There’s even a guide on writing guides if you’d like to contribute!
Community – The Community tab is what you’ll click to access the Wowhead forums. It’s also where you’ll go to learn about site Reputation and site Achievements you can earn for contributing to database entries, contests Wowhead is running. You can also access their social media pages from here.
Wherever you go on the site, every other section is a mere click away. The tabs at the top of the page will help you navigate to where you want to go.
We encourage you to visit Wowhead and explore all the tools the site has to offer. If you’re already a Wowhead user, what sections of the site do you visit most often and find the most helpful? You’re also welcome to share any additional resources you may use or tips and tricks for those looking to learn more about World of Warcraft.
We’ll be bringing you more fansite profiles in the future.
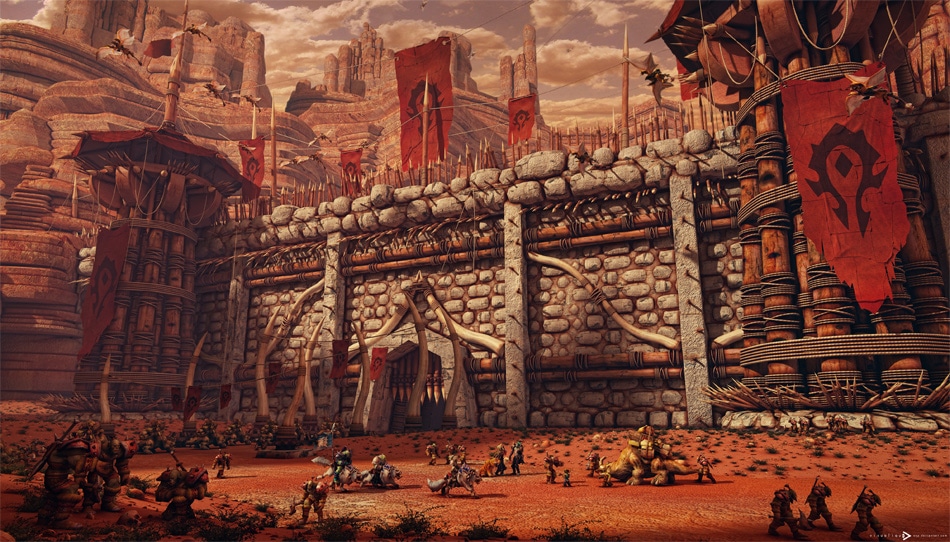
Azeroth’s mightiest protectors have defeated a seemingly endless procession of memorable foes over the years, and while the legions of heroes have since moved on to more pressing threats, those old foes from the past still brood in their lairs. There they sit, lording over their loot, agonizing over their defeats, just waiting for a chance to unleash vengeance. And you can head back into their strongholds to put them back in their place.
We’d like to help those who have never given taking on an older raid a shot to feel more comfortable exploring the older content. Even if visiting and looting these locales is old hat, you might still find something of value within. If you’ve never given it a try at all, there are actually plenty of good reasons to visit older instances:
Lore - Running past raids and dungeons is a great way to catch up on lore and have experiences that you might otherwise have missed.
Transmogrification - Even if the gear itself doesn’t offer any power to a max-level character, set pieces and random drops from older raids can fill out your wardrobe of Transmogrification items quite nicely.
Pets– A number of older bosses now have a chance to drop Battle Pets that you can collect or cage and sell.
Mounts - Many players dive into old raids specifically to pick up rare mounts, such as the much sought after Ashes of A’lar.
Tip: Keep in mind that some mounts, such as Mimiron’s head, will only drop from specific versions of an encounter or when certain conditions are fulfilled, so be sure to read up and plan accordingly!
Reputations - Some players use old school raids as a way to bolster their list of Exalted reputations for achievement titles such as Exalted and Beloved.
Fun - Perhaps most importantly, it can be great fun to explore the environments that are featured in older content, or play up the fantasy of being the lone adventurer exploring an enemy’s fortress, facing down hordes of bad guys, and standing against the odds to defeat a great evil. Often music and environments are exclusive to certain Raids, and there’s nothing quite like experiencing the art in its original context. Going it alone can also allow you to take your time and let you to take in the sights when that isn’t always possible if a group is waiting on you.
Going Solo
As a level 90 character, you should be able to beat most Raid encounters from classic through Wrath of the Lich King without breaking a sweat. If you’re particularly well geared and have the right class tools at your disposal, even Cataclysm encounters might be possible. Gear, class abilities, and individual skill all play a significant role in what you can actually handle. Please keep in mind that World of Warcraft isn’t balanced with soloing past raid content in mind, so some classes might be better suited to the task than others. You might want to bring a friend along if a particular encounter is proving too much for you to handle. That said, it can add to the fun and challenge to see what you can do on your own.
First Steps: Molten Core
The Molten Core lies at the very bottom of Blackrock Depths. It is the heart of Blackrock Mountain and the exact spot where, long ago in a desperate bid to turn the tide of the dwarven civil war, Sorcerer-thane Thaurissan summoned the elemental Firelord, Ragnaros, into the world. Though the Firelord is incapable of straying far from the blazing core, it is believed that his elemental minions command the Dark Iron dwarves, who are in the midst of creating armies out of living stone.
Faction The different elemental bureaucracies don’t get along, and Neptulon’s servants, including Duke Hydraxis, hate Ragnaros and his armies. As they say, ‘The enemy of my enemy is my friend’ and sometimes the old adage proves true. Thus, slaying enemies within Molten Core increases your faction with the Hydraxian Waterlords. While Duke Hydraxis and his elementals are no longer present on Azeroth, they still appreciate your efforts in taking down the Firelord and his minions.
The entrance to Molten Core is at the northwest ‘spoke’, very close to the door you need to walk through to reach Blackrock Depths, down close to the magma. Fly down, climb the chains down, (or jump down into the magma and walk up the stony ramp that’s on the north side of the chain), and speak to Lothos Riftwalker. He’ll offer to transport you to the Molten Core.
Getting in the Zone
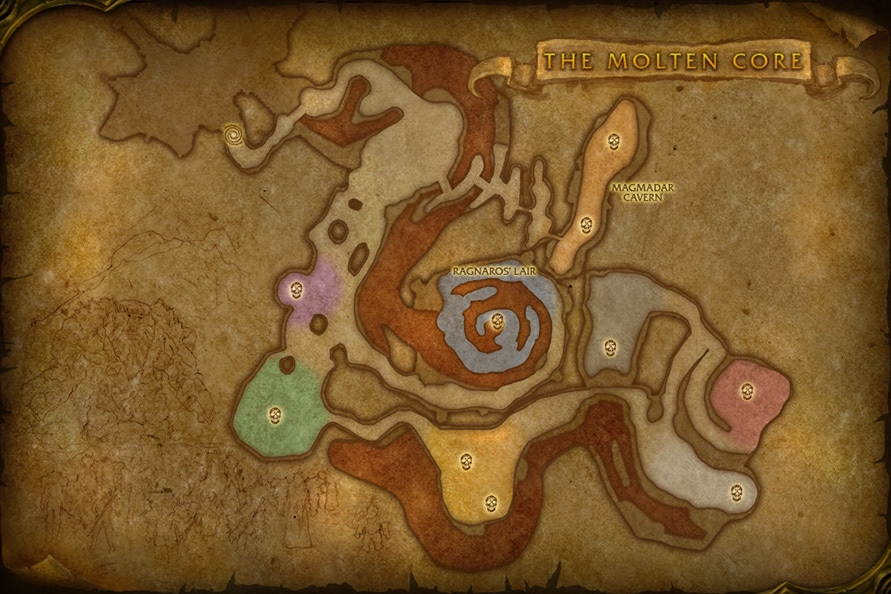
The cavernous lava tubes of Molten Core are not quite as linear as more recent Raid designs. As a result, you’ll need to do a little backtracking here and there, but you shouldn’t have too much trouble finding your way around.
None of the enemies you’ll face here will pose much of a threat to a level 90 character. If you’re an Achievement hunter that’s after reputation, then you might consider gathering them into groups and taking them down en masse, since kills within Molten Core will grant you reputation with the Hydraxian Waterlords. Some creatures also drop materials that can be used to forge both Legendary weapons, as well. Finally, killing the various elementals that inhabit the Core offers you a chance to pick up Bind on Equip Tier 1 wrist and belt items for your own Transmogrification sets, or to sell on the auction house.
Molten Mugshots
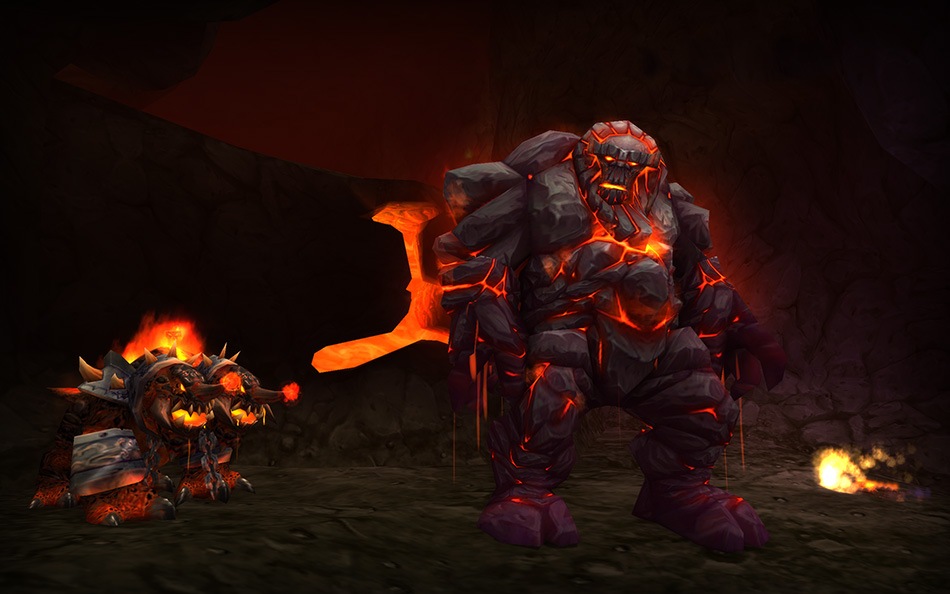
Molten Core is filled with the fiery minions of Ragnaros, including magma giants, Flamewakers, fire elementals, and an exceptionally large Core Hound.
Head inside, and dodge around the various fire and stone elementals you’ll find waiting for you, then veer left over the small island and bridges. After passing through two small chambers, you’ll find yourself in Magmadar’s Cavern.
Lucifron – Lucifron is a prominent member of the diabolical looking Flamewaker (not FlamewaLker) elemental race. You’ll find him surrounded by packs of Core Hounds, as he patrols with a pair of Flamewaker Protectors within Magmadar’s Cavern.
Lucifron’s Curse lasts for 5 minutes and increases spell and ability costs by 100%. Potentially inconvenient if you don’t have a means of dispelling it.
Tip: You probably don’t need to fight the Core Hound packs at all, but if you do, be sure to kill them all around the same time, or any remaining Core Hounds that are still alive after 10 seconds will cause nearby slain Core Hounds to return to life.
Magmadar – Who knew that Ragnaros was a dog person? Magmadar is a Core Hound of unusual size. His only ability of note to high level characters is Panic, which incites an 8 second fear.
Pet hunters, take note! Magmadar has a chance to drop the Blazing Rune, which will add a Corefire Imp to your pet roster.
After you put down Magmadar, head out of his cavern, then veer down and to the left. You’ll find Gehennas and his pals lurking in an alcove on the right.
Gehennas – Another of Ragnaros’ Flamewaker servants. He’s accompanied by a pair of Flamewaker Elites. While it probably won’t represent much of an inconvenience, keep in mind that his curse reduces healing by 75%.
Now that Gehennas has been laid low, proceed further into the Core past a number of Molten Destroyers to find Garr and a slew of small followers toward the south end of the cavern.
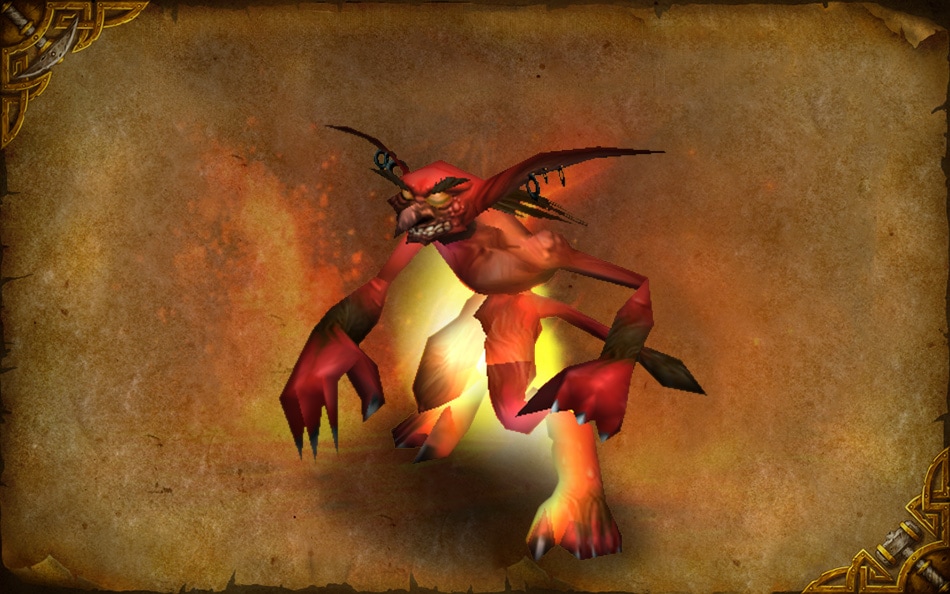
Garr – One of Ragnaros’ lieutenants, Garr is a massive obsidian elemental, ringed by eight Firesworn servants. If you’re after Thunderfury, Blessed Blade of the Windseeker, you’ll want to keep in mind that he has a chance to drop the right half of the Bindings of the Windseeker.
His Firesworn will explode when slain, which causes a knockback. Put your back up against a wall to ensure that you aren’t hurled into the midst of the other creatures in the chamber, if you left any of them alive.
Any luck on those Bindings? No? Okay, well, head east into a smaller tunnel toward the chamber where Shazzrah awaits you. You’ll also find Baron Geddon roaming through the area.
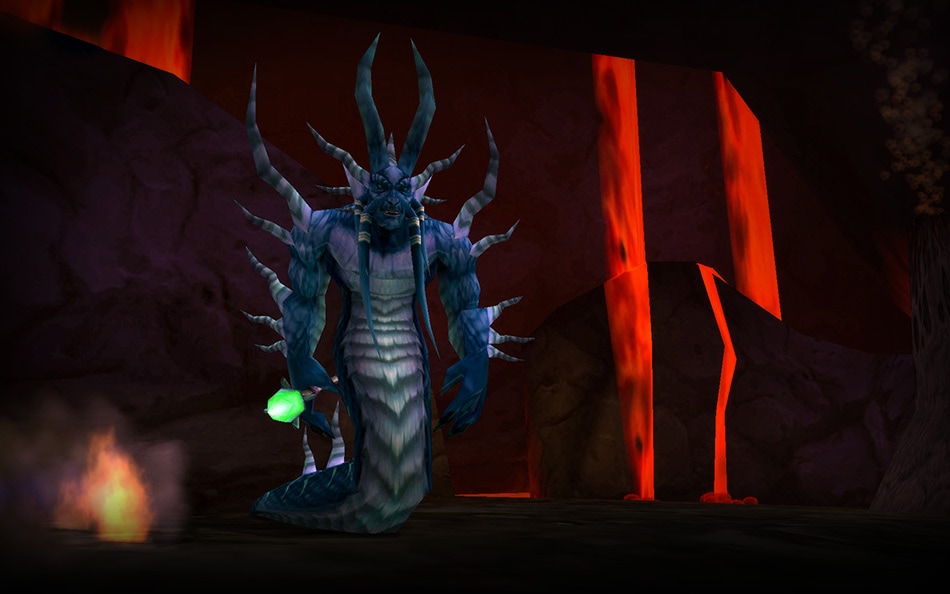
Shazzrah – Unlike the other Flamewakers in Molten Core, Shazzrah is blue. He’s also a talented Arcane spell caster once feared for his Arcane Explosions.
After making short work of Baron Geddon and Shazzrah, you can head up over a narrow path. If you peer down the drop off to the left, you’ll see Golemagg the Incinerator along the way, but let's visit Sulfuron Harbinger first.
Sulfuron Harbinger – A high ranking Flamewaker, and Ragnaros’ herald. He’s accompanied by four Flamewaker Priests. Dropper of the much-reviled Vendorstrike. Of note, Sulfuron has a much more desirable drop: the Mark of Flame, which will add the Harbinger of Flame to your pet roster when learned. Now then, remember that ledge you saw Golemagg from? Let's head back that direction.
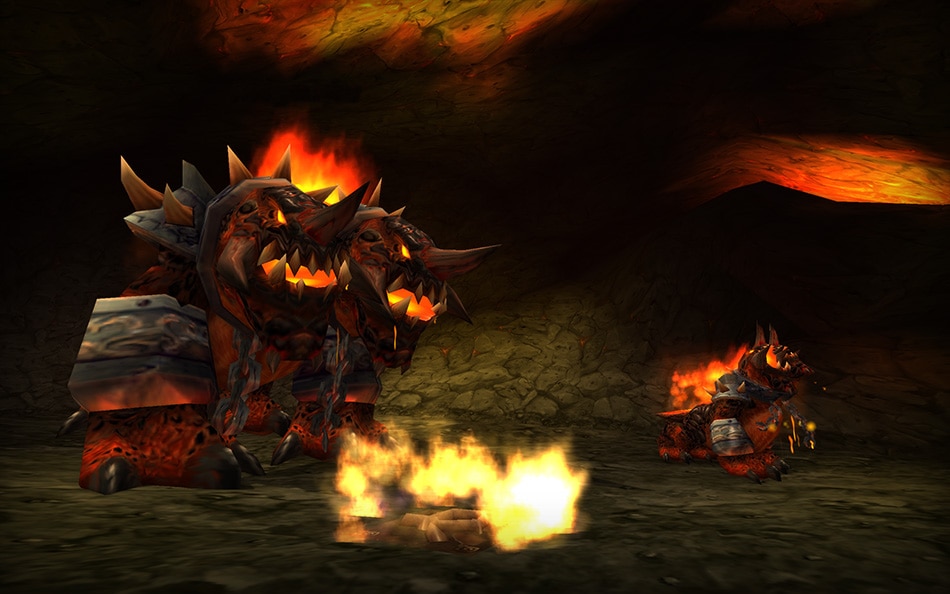
Golemagg the Incinerator – While there are many molten giants in Molten Core, Golemagg is the greatest of them. He’s certainly the giantest. You’ll find him accompanied by two pet Core Ragers. You should focus on Golemagg himself though, because until Golemagg is slain his loyal pets will refuse to die, healing back to full health once they are dropped to below 50%.
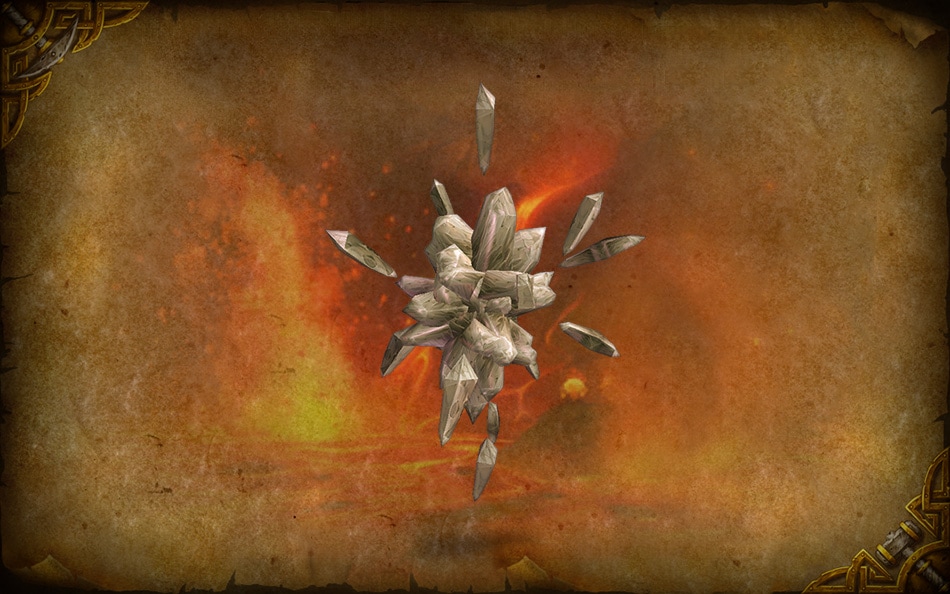
Battle Pet hunters! When you cut Golemagg down to size, you could recruit an Ashstone Core from the Core of Hardened Ash he drops.
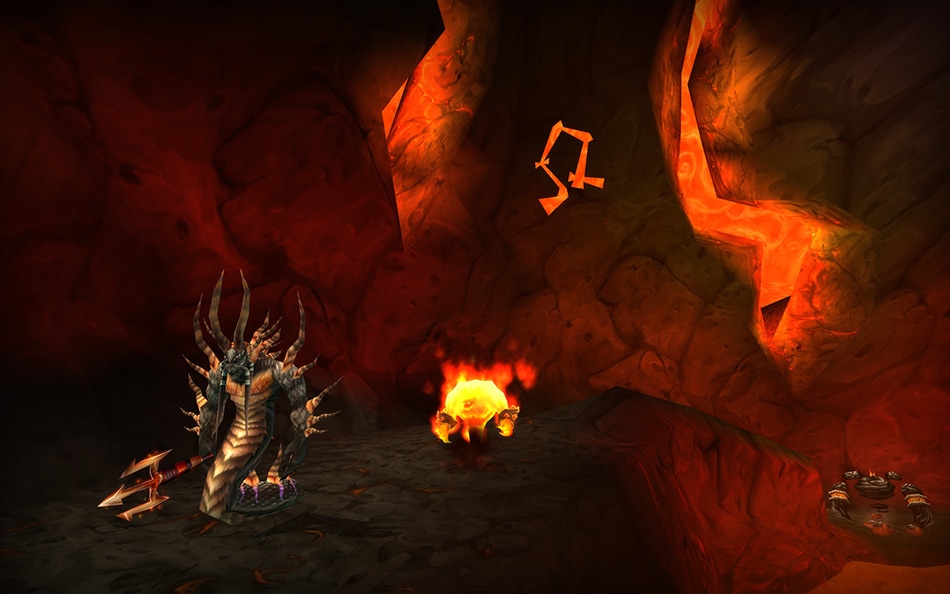
After taking out Sulfuron and Golemagg, head up the path to the northeast that leads to the raised area where Majordomo Executus and friends wait for you.
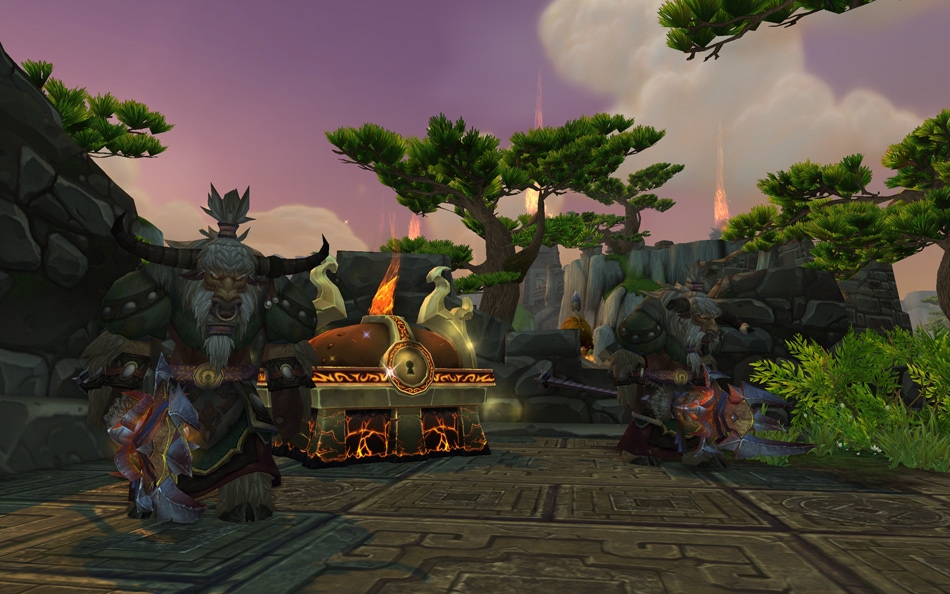
Majordomo Executus – Majordomo Executus won’t appear until after you’ve cleared out the other bosses inside Molten Core. He accompanied by four Flamewaker Healers and four Flamewaker Elites, and you’ll need to slay all eight to defeat the encounter. Executus himself is something of a coward, and will submit once you’ve defeated his companions. Don’t forget to open the Cache of the Firelord, since you won’t be looting Executus’ corpse.
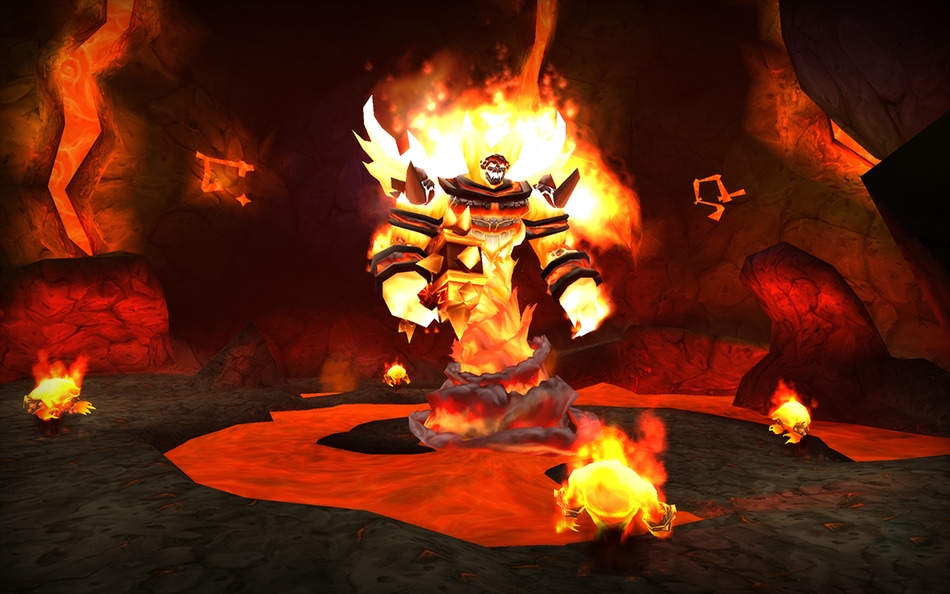
Time to backtrack. After Executus comes to a gentleman’s (gentlesalamander's?) agreement with you, it’s time to head back to Ragnaros’ Lair. Once you arrive, you’ll need to speak with Majordomo Executus again, and he’ll obligingly wake up Ragnaros from his nap, like Azeroth’s worst alarm clock: Too soon.
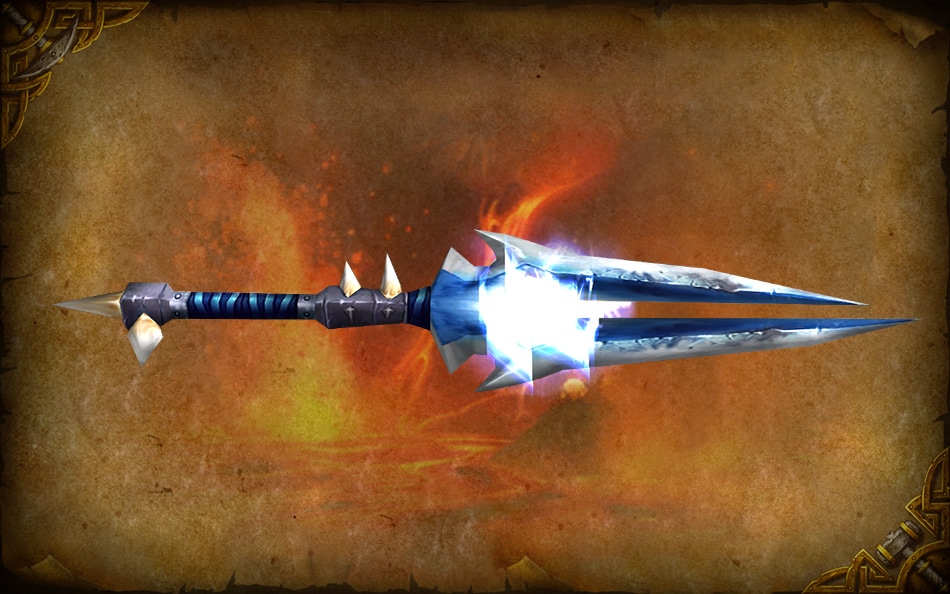
If you’re in the market for Sulfuras, Hand of Ragnaros, then keep your eyes peeled for the Eye of Sulfuras among the items he drops. Combining the Eye with a Sulfuron Hammer will reward you with the Legendary hammer. Ragnaros doesn’t drop any Tier 1 armor, but if you want to complete a set of Tier 2 raid gear for Transmogrification purposes, Ragnaros is where you get the Tier 2 leg items.
Tip: You’re unlikely to get every drop that you’re after on a single run. Molten Core resets weekly though, and you can return to try again. You can check the status of your raid lockouts by opening the social pane (default key ‘O’), selecting the Raid tab, and then clicking the ‘Raid Info’ button on the upper right.
Upon defeating Ragnaros and watching the great hammer Sulfuras dunk itself in his magma pool, your journey is over. That wraps up our walk-through of Molten Core, but that’s not the end. We’ll be pointing out the highlights of more older raids in the future.
In the meantime, have you visited Molten Core recently, and if so, what were you there to achieve? Do you have any tips or warnings for players who might be attempting Molten Core below level 90?
Thank you for sharing your story with us. It always feels a little odd to comment on situations like this as a Community Manager, for fear that it might seem insincere. So, as a person, I just wanted you to know that I and many others here at Blizzard were affected by what you wrote.
Please accept our condolences on your loss. At their best, games can bring us closer to together with those we love, and I'm glad that World of Warcraft could help play a part in that for you and your family.
WoW players have access to an endless arsenal of community-made resources, including guides, utilities, and news sites—often mixing all of the above. We want to guide you to the tools that will help you enjoy World of Warcraft to the fullest, and to accomplish that lofty goal, periodically we’ll point you toward a site that offers the kind of content we think you’ll find valuable.
Icy Veins is one such resource! Having recently celebrated their third year as an active fansite, they’ve become an important source of WoW knowledge for players all over the world. Icy Veins is a guide site where players can learn more about a wide range of topics, including classes, Raid and Dungeons, Transmogrification items, and more. New players are often referred to Icy Veins to learn the basics regarding how to play their preferred class and spec.
Points of Interest
When you visit Icy Veins, the front page will point you their featured content, popular guides, and recent and trending forum topics. In addition, the site has a few main sections:
Forums—Mingle with the Icy Veins community and join discussions on virtually any World of Warcraft topic you can think of.
Classes—The Class Guides at Icy Veins are a major draw. They cover how to play every spec of every class, including Talents, rotations, useful abilities, gearing, ideal item enhancements, and useful add-ons and macros. There are also helpful guides on how to play each of the class roles as well.
Raids and Dungeons—If you’re gearing up to do a Raid or just stepping into a 5-player Dungeon, Icy Veins has guides covering every boss of every recent instance. Dive in and be prepared.
Events—The Events section covers not only all of the holiday events, but includes guides on special zones such as Timeless Isle as well.
Quests—The Quests section of the site will help you get up to date on the Legendary cloak quest line, as well as faction quests in Mists of Pandaria.
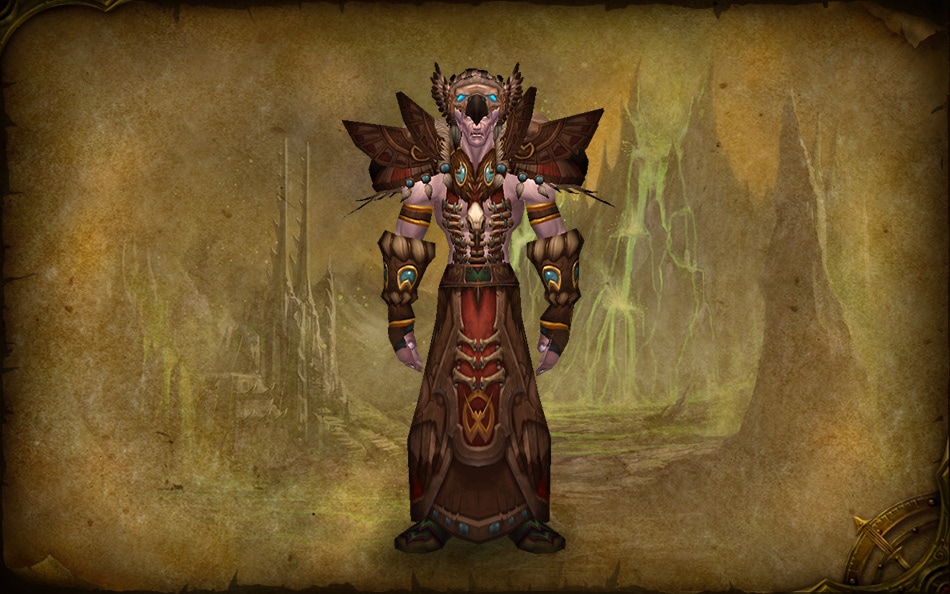
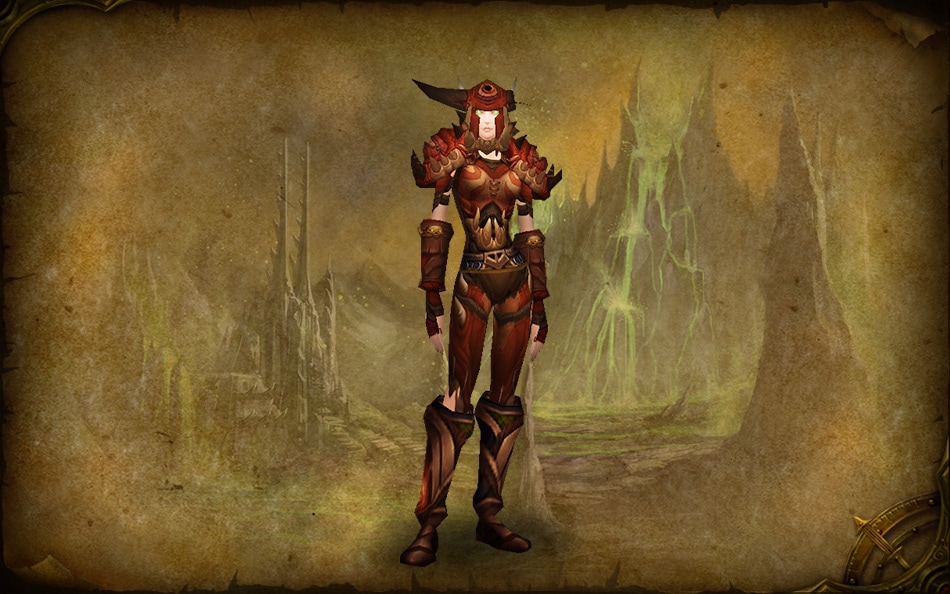
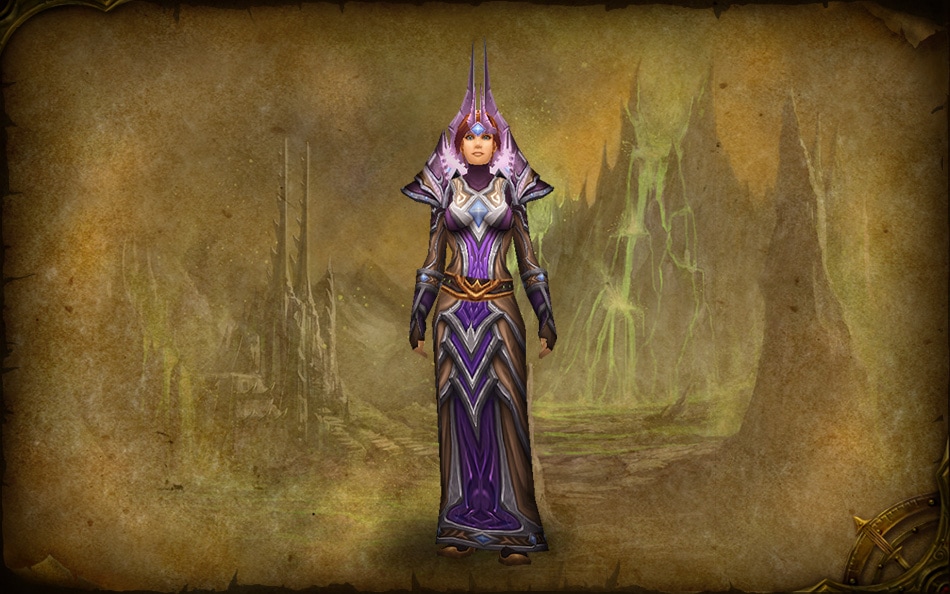
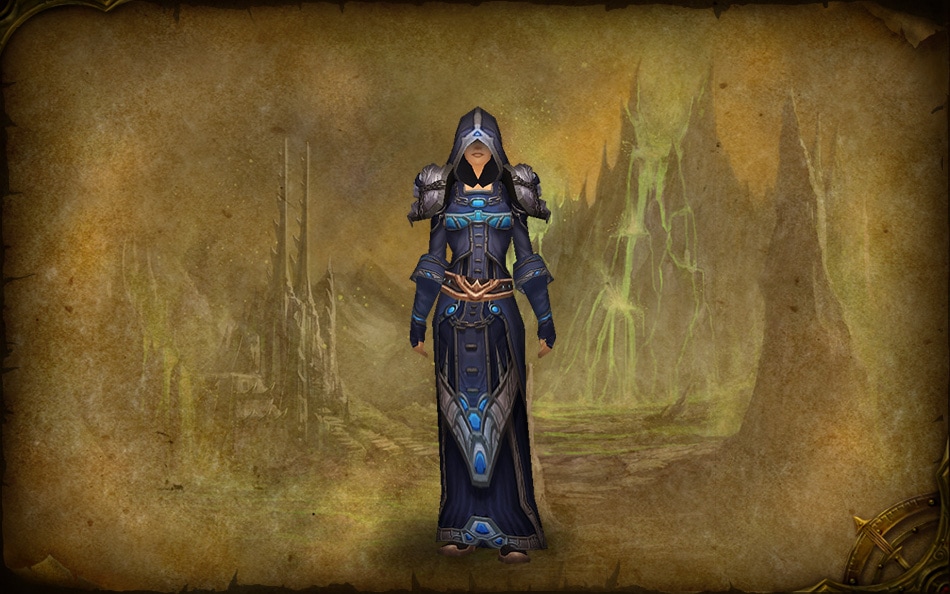
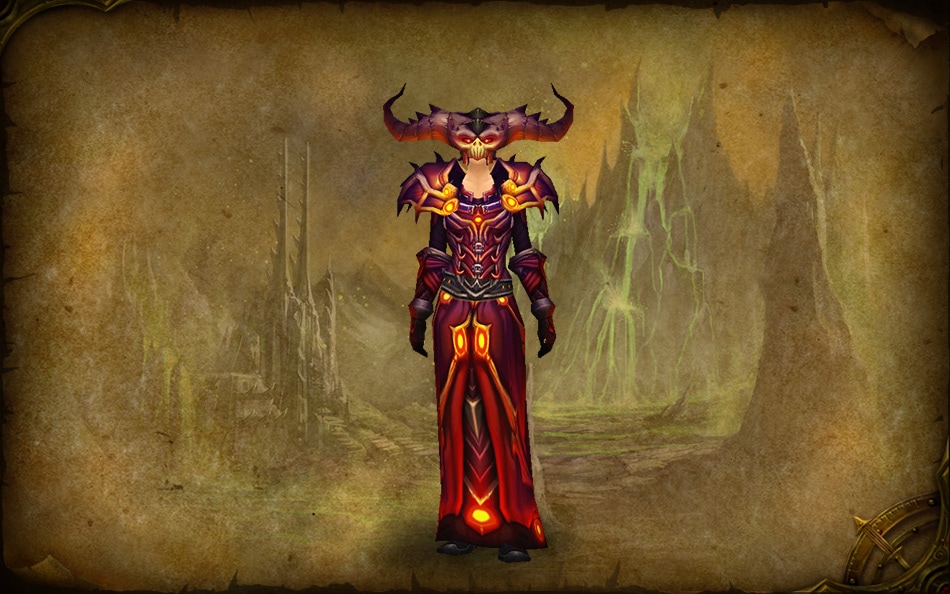
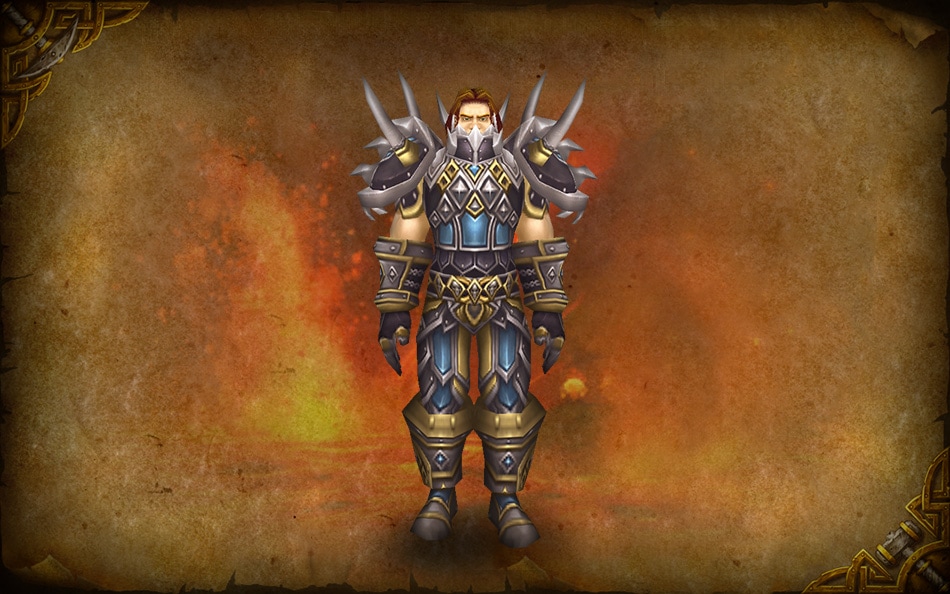
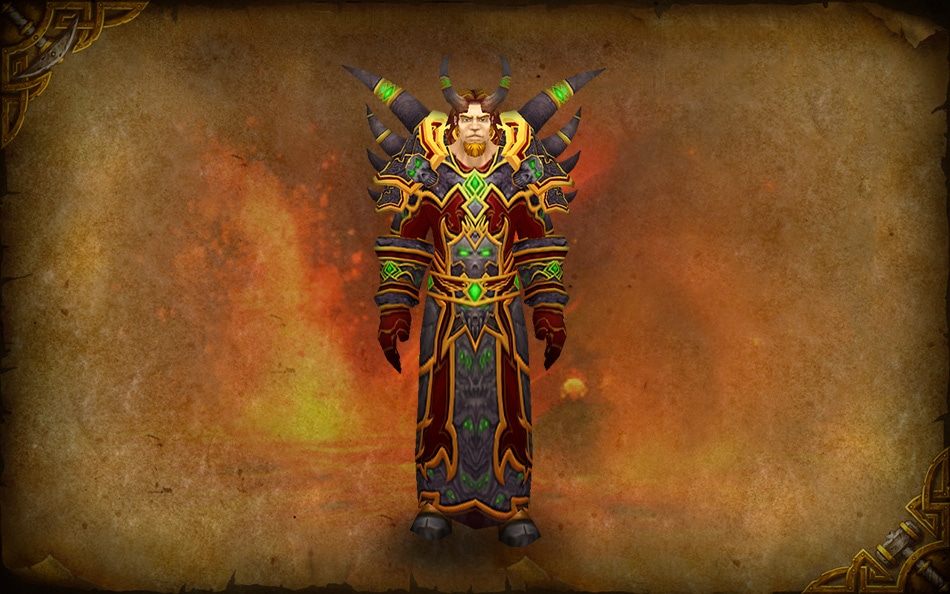
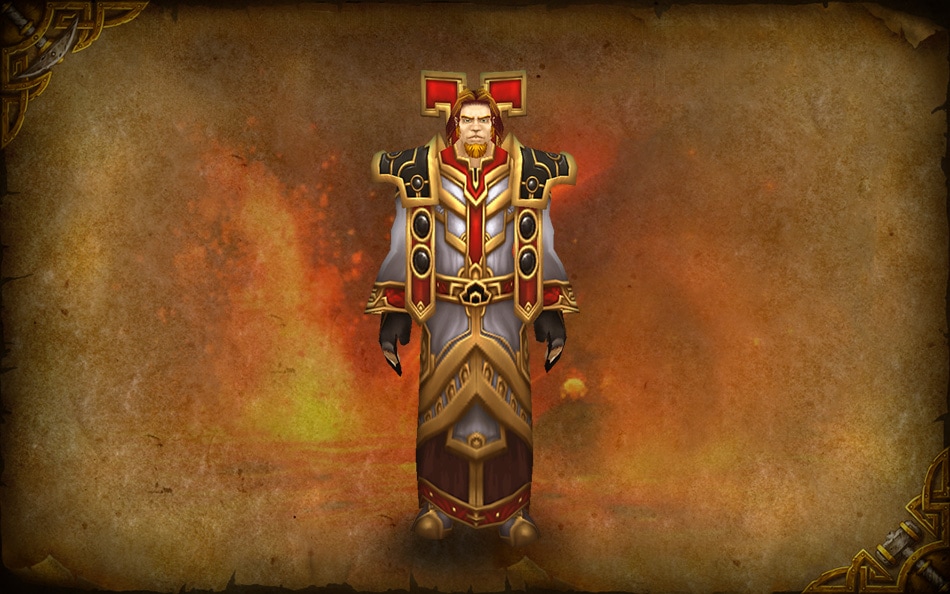
Transmogrification—If you need inspiration for a good-looking Transmogrification set, this is the section for you. Items are divided by class, and the site includes images of many gear sets for each class as well as information on how to acquire the pieces. Since the guides are visual, it’s easy to browse around and find just the piece you need to complete the look you’re going for.
We encourage you to visit Icy Veins and have a look around, and feel free to let us know in the comments below if you’ve visited Icy Veins before and what you found most helpful. You’re also welcome to share any additional class resources you may use or tips and tricks for those looking to learn more. We’ll be bringing you more fansite profiles in the future.
We recently implemented a hotfix to address a bug that allowed Personal Ratings to exceed Matchmaking Rating. As a result, some players may notice that they do not gain or lose Personal Rating in the wake of a match. As more matches are played, these ratings will normalize and converge to the correct rating, and Personal Rating will then rise or drop accordingly.
In the meantime, we will continue to monitor the situation and make further adjustments if necessary.
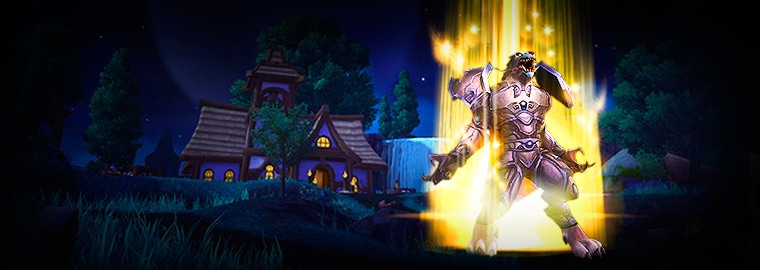
The Level 90 Character Boost has arrived! There might very well be a shiny Boost token glittering on you character selection screen just waiting for you to use it. Or, perhaps you’ve already Boosted a character, but you’re not quite sure what to do next.
We’re here to help! We’ve assembled useful resources, official and fansite alike, so you can make informed decisions regarding which character to Boost, learn how to play and gear your new class like a pro, and make the most of your new hero.
You don’t need to read every single source of information contained in this guide, but we wanted to provide you with the tools for success with your new level 90 character. Veteran or newcomer, there’s almost certainly something here for you.
The first question you’ll probably have (and the topic of many new forum threads) is, “What race and class should I Boost?” Perhaps it’s the class that you’ve always wanted to play, but never got around to playing. Or, how about an existing character that you want to start using at level 90 right now?
It’s a good idea to think about what class roles interest you the most, and which faction you’d like your new character to join. This might be an ideal opportunity to pick up that opposite faction character so you can join friends on the other side, or just to see what World of Warcraft looks like from a different perspective.
Boost Tip:Profession Boost! Something to keep in mind when you Boost a level 60 or higher character, is that you’ll also get a Profession boost. If you don’t have professions selected, then ‘appropriate’ professions will be selected for you. (i.e. Cloth- Enchanting & Tailoring, Leather/Mail- Leatherworking & Skinning, Plate- Blacksmithing & Mining) If you’d rather pick your own professions, simply log in to the character you are going to Boost first, train the professions you want, then log out and Boost the character. Once you’ve completed your boost, those professions (as well as First Aid) will be automatically bumped up to a skill level of 600. Keep in mind that you will still need to earn or purchase any recipes you haven’t already learned.
There are many additional resources that can be found within the World of Warcraft community. Reading over the following guides can help you get a bead on what to expect from each class, and they’re especially helpful if you’ve never played a particular class before:
New Player Tip: Don’t forget to check out the Core Abilities tab in the Spell Book (P). Your main class abilities will be listed there, along with some basic advice regarding when and how each ability should be used.
It’s a cliché, but in World of Warcraft, knowledge truly does translate into ULTIMATE POWER. Invest a little bit of time and research, and you’ll find ways to make your new character more potent and effective.
Class Guides- Learning your character’s primary spells, how best to use them, optimal gear, glyphs, and talents are all vital parts of playing your class well. This guide will help get you started, and this site provides a comprehensive primer on the finer details of each class and spec that you’ll want to know.
Official Forums - The Class Forums on the World of Warcraft official forums can offer a wealth of knowledge about your new character.
Training Dummy - After you get your hotkeys mapped out, and you have some idea about what abilities you should be using and when, a good next step for damage dealing DPScharacters, and even tanks, is to visit a Training Dummy. You can practice your ability rotations, get familiar with gaining and spending your class resources, and make sure that your important hotkeys are easy to access.
Proving Grounds – It’s time to put what you’ve learned to work, and the Proving Grounds provide an excellent way to learn the basics, and then hone and practice your class role. Even better, Proving Grounds are done solo, free from the pressure that might be present in a group set on taking down bosses. You can try new things, and learn your abilities without fear of consequences. Given that there are no target dummies suitable for healing, it’s also a fantastic way to develop your healing skills, learn mana management, and work on prioritizing your healing spells according to the situation you’re facing. Whether dealing damage, tanking, or healing, Proving Grounds will help you develop skills that will serve you well throughout your time in Azeroth. Visit the Temple of the White Tiger in Kun-Lai Summit, and then speak with Trial Master Rotun inside to begin.
Add-Ons, key-bindings, and macros are user interface (UI) tools that can help you perform at your best. They allow you to play more efficiently, react more quickly to situations as they arise, and maximize your play. You can certainly enjoy World of Warcraft without them, but many successful players reap the benefits they provide.
Macros – Macros allow you to alter one of your hotkeys to behave in different ways. For example, you could create a macro that triggers one ability when you have a friendly target, and a different ability if you have a hostile target, all on the same key. Macros are powerful tools that can help save space on the hotkey bars and help you play more efficiently. Learn the Macro basics on our Interface and Macros forum.
Key Binding – Advanced players often swear by key binding because it helps put more of a character’s abilities directly at their fingertips. It can help increase response time and efficiency, which matters during high intensity play like competitive PvP and raiding. In addition to the article hyperlinked above, you can get tips on key binding from your official Class Forum, and the Interface and Macros forum.
Add-Ons – Unlike macros and key binding, which are available to the default UI, Add-Ons are files you add to your World of Warcraft folder that actually alter how your interface behaves. There is a wide world of Add-Ons out there that can accomplish an amazing variety of goals. In addition to getting recommendations on useful Add-Ons from some of the guides and sites we’ve linked to in this blog, you can learn more about UI Add-Ons and how to install them on the official Interface and Macros forum.
So now your character is all set up to head out into the world to tank, heal, and do some damage. You’re still wearing your Boost gear, though. It’s great for getting you started, but you can do better, and the links below will guide you to more efficient gearing upgrades so you can move on to tougher challenges. In addition to the knowledge you’ve gained, better gear will make those experiences more fun for you and those you play with.
General Gearing Tips – This guide will not only help get you started on a path to better gear, but will also point you at some other worthwhile pursuits along the way.
PvP Gear – Honor will buy item level 522 gear. Remember: PvP Power and Resilience don’t consume any of an item’s stat budget, so that’s item level 522 in PvE as well. That guide will also offer methods of earning Honor to buy this gear without ever actually stepping into a Battleground, if PvP isn’t your cup of tea.
Timeless Isle – The Timeless Isle is a very practical first destination for upgrading Boost gear, but it can be mysterious to the uninitiated. Learn all about getting the rewards from chests, rare spawn creatures, and more from this guide.
Gems, Enchants, And More – Optimizing your gear for your spec will dramatically improve your performance. Ask Mr. Robot can help you figure out how to best Reforge* your gear, what gems to socket, and which enchants and improvements you can make. *It’s important to note that in Warlords of Draenor, Reforging will no longer be available. Keep an eye out on ongoing development updates to learn more about what this means for you and gearing up in the future.
Crafting – You can also make or buy items that are quite decent upgrades from your Boost gear. If you’ve got the materials and access to the patterns, this is also a great way to make use of the Profession Boost too. You can find out which items are useful by visiting WowHead’s item search. You can then customize your search by modifying the Source (within the drop box below the “Color” option) and selecting “Crafted by a profession”. You can then filter further by selecting Leatherworking, Tailoring, or Blacksmithing in the drop down box next to it. In addition to crafting pieces of gear or powerful item enhancements, the various crafting professions offer ways to improve existing gear in large or small ways, some of which are unique to each profession.
Knowledge is a powerful weapon. You should have a handle on your character and abilities by now. The other half of the battle is knowing who and what you’ll face, and how to defeat them. As Sun Tzu said, "Know thy self, know thy enemy. A thousand battles, a thousand victories."
Knowing just what to expect from a fight will help your Dungeon Finder and Raid Finder runs go much more smoothly, which will help you have more fun and the chance to earn loot faster too.
Raid Finder – Your first step into the raiding environment will probably be via the Raid Finder (also sometimes referred to as LFR), and it’s a great place to start. This guide will make your first steps into the Raid Finder easier.
Know Your Bosses – You might have the opportunity to eventually do Flex, Normal, and even Heroic Mode Raids. After all, those sweet, sweet Heirloom weapons are calling, and you can earn them by defeating Garrosh in all Siege on Orgrimmar raids except Raid Finder versions. Learning the fights in advance will ensure that you’re not the one left standing in the fire. Knowing the fights is also essential if you plan to do any tanking.
Tip: If you haven’t looked up a fight in advance or just need to refresh your memory, remember that the Dungeon Journal is just a key press away. Hit ‘M’ while in a dungeon to bring it up, or click the boss icon on the minimap to pull up the journal entry on that boss.
Appendix: Try Another Path
How varied the specializations (spec) are varies from class to class, but you’ll find that each spec can ‘feel’ very different from the others. If you’re playing a class that you haven’t tried before, it’s good idea to get comfortable with one spec to begin with. After you do that, then it’s also wise to try the other specs that your new character offers, both for the sake of flexibility– since different specs are often suited to different class roles– and also because another spec might just be more fun for you.
New Player Tip: You can change spec at any of your class trainers, as well as purchase dual spec, which will let you swap between specs without seeing a trainer. Don’t forget that different specs often benefit very differently from Secondary Stats. With that in mind, you can make gearing your new spec easier by holding on to duplicate gear tokens you find during your adventures on the Timeless Isle. You can then open them after your character is in its new spec. The stats will then be aimed for that spec, rather than your old one. The PvP gearing method can also help you more quickly earn items appropriate for your new spec.
We’d also love to hear from you! Which character did you Boost? How are you gearing up your Boosted character? Do you have tips or guides to share that we haven’t shared here? Let us know in the comments, and on the New Player Help and Guides forum.
The Level 90 Character Boost has arrived! There might very well be a shiny Boost token glittering on your character selection screen just waiting for you to use it. Or, perhaps you’ve already Boosted a character, but you’re not quite sure what to do next.
We’re here to help! We’ve assembled useful resources, official and fansite alike, so you can make informed decisions regarding which character to Boost, learn how to play and gear your new class like a pro, and make the most of your new hero.
You don’t need to read every single source of information contained in this guide, but we wanted to provide you with the tools for success with your new level 90 character. Veteran or newcomer, there’s almost certainly something here for you.
The first question you’ll probably have (and the topic of many new forum threads) is, “What race and class should I Boost?” Perhaps it’s the class that you’ve always wanted to play, but never got around to playing. Or, how about an existing character that you want to start using at level 90 right now?
It’s a good idea to think about what class roles interest you the most, and which faction you’d like your new character to join. This might be an ideal opportunity to pick up that opposite faction character so you can join friends on the other side, or just to see what World of Warcraft looks like from a different perspective.
Boost Tip:Profession Boost! Something to keep in mind when you Boost a level 60 or higher character, is that you’ll also get a Profession boost. If you don’t have professions selected, then ‘appropriate’ professions will be selected for you. (i.e. Cloth- Enchanting & Tailoring, Leather/Mail- Leatherworking & Skinning, Plate- Blacksmithing & Mining) If you’d rather pick your own professions, simply log in to the character you are going to Boost first, train the professions you want, then log out and Boost the character. Once you’ve completed your boost, those professions (as well as First Aid) will be automatically bumped up to a skill level of 600. Keep in mind that you will still need to earn or purchase any recipes you haven’t already learned.
There are many additional resources that can be found within the World of Warcraft community. Reading over the following guides can help you get a bead on what to expect from each class, and they’re especially helpful if you’ve never played a particular class before:
New Player Tip: Don’t forget to check out the Core Abilities tab in the Spell Book (P). Your main class abilities will be listed there, along with some basic advice regarding when and how each ability should be used.
It’s a cliché, but in World of Warcraft, knowledge truly does translate into ULTIMATE POWER. Invest a little bit of time and research, and you’ll find ways to make your new character more potent and effective.
Class Guides - Learning your character’s primary spells, how best to use them, optimal gear, glyphs, and talents are all vital parts of playing your class well. This guide will help get you started, while these guides and this site provide a comprehensive primer on the finer details of each class and spec that you’ll want to know.
Official Forums - The Class Forums on the World of Warcraft official forums can offer a wealth of knowledge about your new character. The Class Roles forum often hosts great discussions that allow players to ask questions, get clarification, and drill down on best practices and good techniques.
Training Dummy - After you get your hotkeys mapped out, and you have some idea about what abilities you should be using and when, a good next step for damage dealing DPScharacters, and even tanks, is to visit a Training Dummy. You can practice your ability rotations, get familiar with gaining and spending your class resources, and make sure that your important hotkeys are easy to access.
Proving Grounds– It’s time to put what you’ve learned to work, and the Proving Grounds provide an excellent way to learn the basics, and then hone and practice your class role. Even better, Proving Grounds are done solo, free from the pressure that might be present in a group set on taking down bosses. You can try new things, and learn your abilities without fear of consequences. Given that there are no target dummies suitable for healing, it’s also a fantastic way to develop your healing skills, learn mana management, and work on prioritizing your healing spells according to the situation you’re facing. Whether dealing damage, tanking, or healing, Proving Grounds will help you develop skills that will serve you well throughout your time in Azeroth. Visit the Temple of the White Tiger in Kun-Lai Summit, and then speak with Trial Master Rotun inside to begin.
Add-Ons, key-bindings, and macros are user interface (UI) tools that can help you perform at your best. They allow you to play more efficiently, react more quickly to situations as they arise, and maximize your play. You can certainly enjoy World of Warcraft without them, but many successful players reap the benefits they provide.
Macros – Macros allow you to alter one of your hotkeys to behave in different ways. For example, you could create a macro that triggers one ability when you have a friendly target, and a different ability if you have a hostile target, all on the same key. Macros are powerful tools that can help save space on the hotkey bars and help you play more efficiently. Learn the Macro basics on our UI and Macros forum.
Key Binding – Advanced players often swear by key binding because it helps put more of a character’s abilities directly at their fingertips. It can help increase response time and efficiency, which matters during high intensity play like competitive PvP and raiding. In addition to the article hyperlinked above, you can get tips on key binding from your official Class Forum, and the UI and Macros forum.
Add-Ons – Unlike macros and key binding, which are available to the default UI, Add-Ons are files you add to your World of Warcraft folder that actually alter how your interface behaves. There is a wide world of Add-Ons out there that can accomplish an amazing variety of goals. In addition to getting recommendations on useful Add-Ons from some of the guides and sites we’ve linked to in this blog, you can learn more about UI Add-Ons and how to install them on the official UI and Macros forum.
So now your character is all set up to head out into the world to tank, heal, and do some damage. You’re still wearing your Boost gear, though. It’s great for getting you started, but you can do better, and the links below will guide you to more efficient gearing upgrades so you can move on to tougher challenges. In addition to the knowledge you’ve gained, better gear will make those experiences more fun for you and those you play with.
General Gearing Tips – This guide will not only help get you started on a path to better gear, but will also point you at some other worthwhile pursuits along the way.
PvP Gear – Honor will buy item level 522 gear. Remember: PvP Power and Resilience don’t consume any of an item’s stat budget, so that’s item level 522 in PvE as well. That guide will also offer methods of earning Honor to buy this gear without ever actually stepping into a Battleground, if PvP isn’t your cup of tea.
Timeless Isle – The Timeless Isle is a very practical first destination for upgrading Boost gear, but it can be mysterious to the uninitiated. Learn all about getting the rewards from chests, rare spawn creatures, and more from this guide.
Gems, Enchants, And More – Optimizing your gear for your spec will dramatically improve your performance. Ask Mr. Robot can help you figure out how to best Reforge* your gear, what gems to socket, and which enchants and improvements you can make. *It’s important to note that in Warlords of Draenor, Reforging will no longer be available. Keep an eye out on ongoing development updates to learn more about what this means for you and gearing up in the future.
Crafting– You can also make or buy items that are quite decent upgrades from your Boost gear. If you’ve got the materials and access to the patterns, this is also a great way to make use of the Profession Boost too. You can find out which items are useful by visiting WowHead’s item search. You can then customize your search by modifying the Source (within the drop box below the “Color” option) and selecting “Crafted by a profession”. You can then filter further by selecting Leatherworking, Tailoring, or Blacksmithing in the drop down box next to it. In addition to crafting pieces of gear or powerful item enhancements, the various crafting professions offer ways to improve existing gear in large or small ways, some of which are unique to each profession.
Knowledge is a powerful weapon. You should have a handle on your character and abilities by now. The other half of the battle is knowing who and what you’ll face, and how to defeat them. As Sun Tzu said, "Know thy self, know thy enemy. A thousand battles, a thousand victories."
Knowing just what to expect from a fight will help your Dungeon Finder and Raid Finder runs go much more smoothly, which will help you have more fun and the chance to earn loot faster too.
Raid Finder– Your first step into the raiding environment will probably be via the Raid Finder (also sometimes referred to as LFR), and it’s a great place to start. This guide will make your first steps into the Raid Finder easier.
Know Your Bosses – You might have the opportunity to eventually do Flex, Normal, and even Heroic Mode Raids. After all, those sweet, sweet Heirloom weapons are calling, and you can earn them by defeating Garrosh in all Siege on Orgrimmar raids except Raid Finder versions. Learning the fights in advance will ensure that you’re not the one left standing in the fire. Knowing the fights is also essential if you plan to do any tanking.
Tip: If you haven’t looked up a fight in advance or just need to refresh your memory, remember that the Dungeon Journal is just a key press away. Hit 'shift-J' while in a dungeon to bring it up, or open the map (default key ‘M’ ) then click the boss icon on the map to pull up the journal entry on that boss.
Appendix: Try Another Path
How varied the specializations (spec) are varies from class to class, but you’ll find that each spec can ‘feel’ very different from the others. If you’re playing a class that you haven’t tried before, it’s good idea to get comfortable with one spec to begin with. After you do that, then it’s also wise to try the other specs that your new character offers, both for the sake of flexibility– since different specs are often suited to different class roles– and also because another spec might just be more fun for you.
New Player Tip: You can change spec at any of your class trainers, as well as purchase dual spec, which will let you swap between specs without seeing a trainer. Don’t forget that different specs often benefit very differently from Secondary Stats. With that in mind, you can make gearing your new spec easier by holding on to duplicate gear tokens you find during your adventures on the Timeless Isle. You can then open them after your character is in its new spec. The stats will then be aimed for that spec, rather than your old one. The PvP gearing method can also help you more quickly earn items appropriate for your new spec.
In addition to the sources above, we also wanted to point out a great forum guide posted by Sederath within the New Player Help and Guides forum. There are some additional tips not found in this guide, and it’s worth your time to check it out.
We’d also love to hear from you! Which character did you Boost? How are you gearing up your Boosted character? Do you have tips or guides to share that we haven’t shared here? Let us know in the comments, and on the New Player Help and Guides forum.


 Death Knight -
  Druid -
  Hunter -
  Mage -
 Priest -
  Rogue -
  Shaman -
  Warlock -
  Warrior -
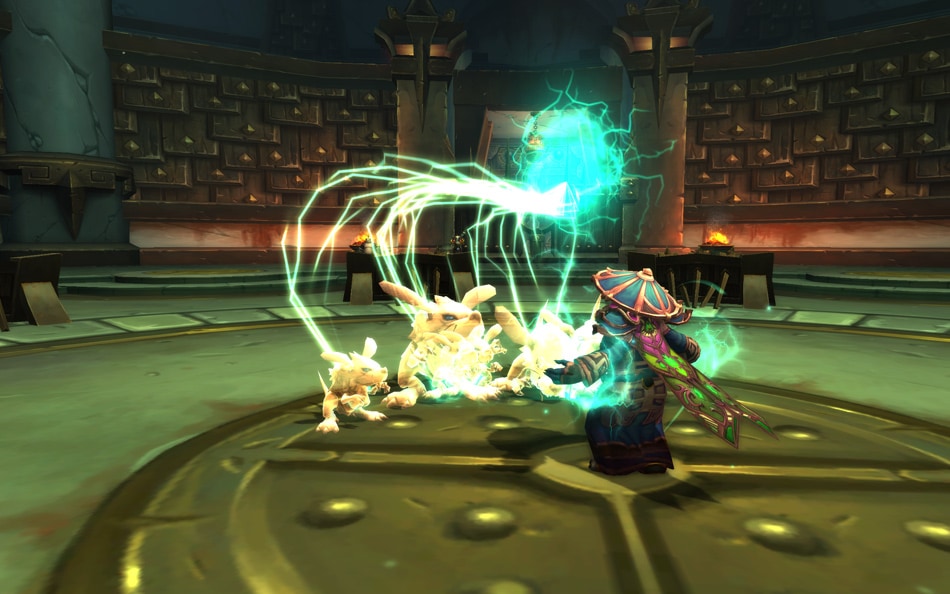