Emboldened by the return of their heroic king, Varian Wrynn, the proud humans of Stormwind led the Alliance to victory in its war against the dreaded Lich King. While successful, the campaign in Northrend proved costly, and the humans now seek to bolster their strategic holdings throughout the world. Under Varian’s daring leadership, humanity now braces itself for a renewed conflict with its perennial enemy—the Horde. Yet, as the great Cataclysm rips across the world, familiar threats have once again arisen closer to home. It now falls to you to defend the kingdom and uphold the honor of humanity.
We thought it was time to take the next step in learning more about World of Warcraft and the lands of Azeroth. In this guide, we take you through the Human starting experience in the ever-verdant Elwynn Forest. We started our adventure with a popular race and class combination, the Human Warrior. See the Warrior Class Overview for further details on playing a Warrior.
Elwynn Forest
- Location: Southern portion of Eastern Kingdoms
- Racial Starting Zone: Humans
- Faction: Alliance
- Nearest Capital City: Stormwind - This is the seat of power for the Human King Varian Wrynn
Being Human: Each of the races of Azeroth has a racial ability. For humans, it’s an ability called Every Man for Himself Every Man for Himself
Removes all movement impairing effects and all effects which cause loss of control of your character. This effect shares a cooldown with other similar effects.. It’s a great “get out of jail free” card that you can use to free yourself from movement impairing effects. It does have a cooldown (wait time before you can use it again) and shares a cooldownShared Cooldowns
Similar items and abilities such as the Horde or Alliance PvP trinket will share this cooldown and won’t be useable again until the cooldown period (2 minutes) is complete. This means that you cannot use both within the same 2 minute period.with other similar effects, so consider its use wisely. with other similar effects, so consider its use wisely.
Northshire Valley
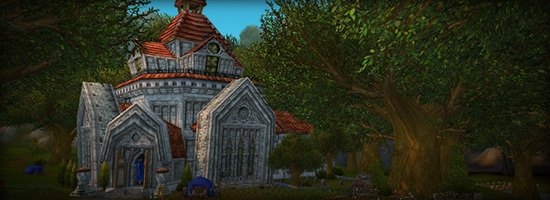
The start of your journey within Elwynn Forest will begin in the Northshire Valley after the brief introductory cinematic. You’ll arrive safely in front of the Northshire Abbey, but things aren’t all that calm in this corner of the forest.
*For players who have never played before, check out the Welcome to World of Warcraft – Basic Movement and Combat blog post for more information.
What’s Here:
- Starting Bind point - In your backpack is a Hearthstone that will automatically return you to the Abbey on use. This is the starting bind point for your character.You’ll be able to change this at other locations such as inns.
- Class Trainers - They’ll provide some guidance to set you on your path and provide additional information when the time comes.
- Vendors - You might want to sell unwanted items at the vendors to earn a little money. You can buy select items from vendors as well such as supplies for professions, food, or drink.
Your First Quest
While you’ll gain experience by killing monsters, one of the best ways to boost your experience (XP) is by completing quests. These also often reward money, items, and sometimes even reputationReputation
Reputations can be earned (or even lost) with different groups in a variety of ways including questing or killing key creatures. These reputations can make new content accessible such as new purchasable items or quests. (u) with various factions. In this case, you’ll be earning reputation with the human faction of Stormwind.
Upon arriving in front of the Northshire Abbey you’ll meet Marshal McBride who stands waiting to give you your first task in this new land. He’s pretty easy to spot as a quest-giver, as it’s indicated by the yellow exclamation point above his head. Simply right-click on him with your mouse to see what he has to say. You’ll quickly learn that Northshire is having a problem with the Blackrock Orc clan, and they need you to help kill the attacking Blackrock worgs. The mini map in the upper right corner of your screen will show you the area in which the quest objectives are located. You can also open the main map (M) to see the areas you will be able to complete the quest within.
Tag, you’re it!: World of Warcraft uses a “tapping” mechanism for monsters in which the player who first does damage to it will be the one to get credit for killing it. By grouping with other players, you can all get credit for kills. While solo, you’ll notice the monsters you’ve “tapped” as having a red nameplate over their head when targeted. If someone else has tapped it, the nameplate will be grayed out instead. It doesn’t hurt to help someone else out now and then, just know you won’t get credit for the kill or be able to loot the target.
As you progress through your new life, you’ll want to keep an eye out for quest-givers who might have new tasks for you. You can keep tabs on your quests within the quest log (L) and manually track them if they aren’t already being tracked by left-clicking on the quest you want to track and then on the Track button You can also untrack quests in the same way. Quests that you are on or tracking will show up on the right side of your screen as Objectives, though it will only display a limited amount of quests at one time. You can also click on any of the listed objectives to open the quest text.
With your first task waiting for you, it’s time to hunt some worgs. You’ll see Stormwind Infantry already engaged with them. A yellow name over the worgs’ heads means they won’t attack you until you attack them; these monsters are neutral until then. Much like interacting with a nonplayer character (NPC), to attack, you can right-click on a target with your mouse or push the 1 key on your keyboard. If you’re too far away from your target, you’ll receive the message “You are too far away!” Once you’re in range, you’ll be able to attack. Engaging a target with an attack sets you to auto-attack that target until your character is interrupted (either by you or something else in-game).
So shiny! Once you’ve killed your first worg, you’ll notice some sparkles coming from its corpse. This means there’s loot on it. Right-click on the corpse and a loot window will open. Right-clicking again will add the objects from the corpse to your backpack (which you can access anytime with Ctrl+B). If you’ve killed multiple monsters or creatures, you’ll automatically loot all of them within range.
As a starting Warrior, you’ll have Battle Stance (an aggressive combat stance which generates high Rage from normal melee attacks) active and Heroic Strike available to use. Using Heroic Strike when it’s available should make short work of your new foes (see the Warrior Class Overview and the Basic Movement and Combat Guide for further details). Once you’ve killed all of the worgs, it’s time to return to Marshal McBride. You’ll notice that your Objectives on the right side of the screen will have updated, letting you know to do just that. Marshal McBride will be waiting for you, but instead of a yellow exclamation point, he’ll have a yellow question mark indicating that you’ve got a completed quest you can turn in to him. You’ll receive some experience, some money, reputation with Stormwind, and a new pair of gloves. To equip your new gloves, open your backpack (Ctrl+B) and then right-click on the gloves in your bag. You can also open your character pane (C) and drag them into the “hands” slot. You’ll want to start equipping any new items you receive within your armor class (Mail for lower level Warriors and plate at level 40).
You’ll move quickly through the starting levels as you complete your quests. You’ll also get to meet your class trainer, who can offer you some additional information on future customization options such as resetting your Class Specialization (available at level 10), resetting Talents (available at level 10), resetting Glyphs (available at level 25), and learning Dual Specialization (available at level 30). Your trainer will also give you a task to learn how to properly learn the Charge ability. This will be your first opportunity to try out a training dummy. These dummies can be used as you progress in levels to test out different abilities and measure your effectiveness with them. We’ll talk about those some other time.
Now that you have Charge, don’t forget to use it when engaging any new targets. Just remember to give yourself enough room to do so—you won’t be able to use it if you’re too close. This ability is a great starting move for these lower levels; it stuns your enemies for a moment so you can engage. If you get lost trying to find your way back to the quest giver, you can always open the map again (M) to see where you are in relation to them if you’re not too far away.
Equipment Tip: You can see all of your equipped items within the character pane (C) and swap out items as well. Simply hover your mouse over the equipment slot you want to look at and hold the ALT key. Any items that can be equipped in that slot will show up next to it. To equip another item, just (while still holding down the ALT key) simply click on it. This is a quick and convenient way to swap older items for newer more powerful items. You’ll also be able to compare a quest-reward item to one currently equipped by mousing over it on the quest-reward screen, or you can hold the Shift key and mouse over an item in your inventory to quickly compare items.
So far, all of the creatures you’ve encountered have not been aggressive to you, but that’s about to change within the vineyards to the east of the Abbey. You’ll want to keep your distance from any of the monsters until you’re ready to engage with them because, as their red nameplates show, they will be aggressive to you if you get within range.
Quest Tip: Quests that ask you to use an item will show the item within the Objectives list on the right side of your screen. To use the item, you’ll simply left-click on the object.
One of your new quests will ask you to find and kill a specific NPC. When you’re given a quest to kill a specific monster or NPC, you’ll be able to identify them by the exclamation point within their target frame when you select them. These are generally harder to kill than normal monsters (also referred to as “mobs”), so make sure you use all of your abilities to stay alive. Remember, there’s no shame in running away to fight another day.
Your time in Northshire Valley will come to an end at approximately level 5. From there, you’ll get the opportunity to travel on to Goldshire within Elwynn Forest to the south. A large yellow arrow will show on your mini map to guide your way, or you can also check your larger map (M) to see where you should be headed. If you aren’t sure if you’ve completed all of the quests in the area, a quick walk around will reassure you. If you don’t see any more exclamation points (and you’ve turned in all of your previously completed quests), you’re all set to move on. You can also take a look at fansite Wowhead, in the “Quests” section of their database, for a complete list of quests and objectives within Northshire.
Travel Tip: It’s generally a good idea to stay on any roads or paths to avoid being attacked by any roaming monsters, though safety is not always assured. Always keep your eye out for any lurking danger. Also note that as you travel through the world, new places will appear on your map as you discover them.
Don’t forget to keep an eye on your General chat pane for any new abilities you’ve gained while leveling. At lower levels, new abilities are also automatically added to your lower left action bar. Take time to read the tooltip so that you understand what any new abilities can do for you. Upon hitting level 5, Warriors get an ability called Victory Rush. This is a great ability to use when you’re switching from target to target, as it will do extra damage and heal your character a certain amount of their health.
Check back tomorrow for levels 5–10 as we travel on into Goldshire.
